31 Violin Concertos Ranked by Difficulty Level
Violin concertos ranked from easy to hard:
How hard are the Mendelssohn, Bruch and Paganini violin concertos to play?
Even when you’ve just started to play violin it’s possible to play beginner and after that intermediate violin concertos. Did you know that there are concertos all in first position?
Below I’m rating the most well known violin concertos from easy to hard. We begin with students concertos by Küchler, Rieding and Seitz. Then we continue with the ‘big concertos’ by Mozart, Bruch, Mendelssohn, Beethoven and Brahms. We end with some of the most difficult modern violin concertos.
I’ll go into exactly what makes all these violin concertos so hard or easy to play and what violin technique is needed to play them.
#1 Ferdinand Küchler: Violin Concerto in D Major in the style of Vivaldi (1937)
Length: 6 minutes (3 movements)
Positions: Almost entirely 1st position with a tiny bit of third on E string only
Important techniques: Fast sixteenth note runs with string crossings, staccato vs. detache markings, slurred sixteenths
How to practice: Practice doing string crossings in rhythms (short-long, long-short, etc) practice slurred sixteenths separately to get the notes first
Comments: This charming little concerto is suitable to begin studying after Suzuki Book 3. It contains minimal shifting, so it is a good first step into using third position in pieces. The dynamics, articulation markings, and rhythms are very clear, as the piece basically only uses quarter notes, eighths, and sixteenths. To play the last movement, make sure you understand how to play in ⅜ time, meaning three eighth notes per measure.
#2 Oskar Rieding: Violin Concerto in B Minor (1909)
Length: 8.5 minutes (3 movements)
Positions: 1st position
Important techniques: Full-bow legato, carrot accents, moving second and third finger between high and low positions.
How to practice: Play scales using legato slurs, focus on flat bow hair, bow distribution, and consistent contact point
Comments: The Küchler focuses on staccato, but this concerto is excellent for learning beautiful legato. The middle movement in particular is so sweet and nostalgic, followed by a much more energetic, fiery third movement. Even though it is all in first position, this piece is full of spirit and musicality.
#3 Antonio Vivaldi: Violin Concerto in A Minor RV 356 (pub. 1711)
Length: 8 minutes (3 movements)
Positions: 1st and 3rd
Important techniques: Bariolage (i.e. fast repeated string crossings)
How to practice: Play just the top part of the bariolage to learn the melody. Always do bariolage in the middle of the bow.
Comments: For many students, learning this piece is when they fall in love with the violin. It contains everything that makes baroque music so satisfying to play. Although it contains more shifting than the Küchler as well as some tricky finger patterns, it is still one of Vivaldi’s easier concertos and quite doable for intermediate players.
#4 Friedrich Seitz: Violin Concerto in G Major, Opus 13 (1893)
Length: 9 minutes (3 movements)
Positions: 1st position
Important techniques: Hooked bowing, double stops, staccato sixteenths, trills
How to practice: For the double-stops, play them separately out of tempo. Then play them slowly in martele to check for intonation and relaxed fingers.
Comments: This is the second of eight student violin concertos Seitz wrote. You may recognize the last movement from Suzuki Book 4. Although it is only in first position, I ranked it after the Vivaldi and Küchler concertos because of the extensive double-stop passages and more complex rhythmic figures. It also contains a short cadenza in the first movement. This is a moment for the soloist to be expressive, a short transition between themes. It is not difficult, but it does call for a new kind of freedom and expressivity.
#5 Friedrich Seitz: Violin Concerto in D Major, Opus 15 (1895)
Length: 13 minutes (3 movements)
Positions: 1st-4th positions, plus extended 4th fingers
Important techniques: Sul G, harmonics, double stops, upbow staccato, ricochet
How to Practice: For upbow staccato, the bow stays in firm contact with the string all the way up while the bow hand fingers create impulses. As with the other Seitz concerto, practice double stops slowly and separately first with no vibrato. Ricochet is a new challenge in the feisty third movements of this piece. Ricochet is an off-the-string technique where you drop the bow onto the string and allow it to bounce naturally. Experiment with dropping the bow from different heights to get the desired speed and height of the bounce.
Comments: This Seitz concerto is one of his less famous, but no less beautiful or exciting. It requires more dexterity and bow control than those included in the Suzuki repertoire. Although it presents several new challenges for growing violinists, the beautiful melodies and fun rhythms make the work well worth it.
#6 Antonio Vivaldi: Violin Concerto No. 4 in G Major RV 310 (pub. 1711)
Length: 7 minutes (3 movements)
Positions: 1st position, minimal 3rd
Important techniques: Bariolage, sudden dynamic changes
How to Practice: Use much ess bow for the softer passages and lighten the contact pressure.
Comments: This piece does not present many challenges different from the Baroque concertos already listed, making it a relatively quick addition to your intermediate repertoire. While the notes are not terribly difficult, the main challenge is emphasizing the dynamics which bring the piece to life.
#7 Oskar Rieding: Concertino in A Minor in Hungarian Style (1905)
Length: 7 minutes (1 movements)
Positions: 1st-3rd
Important techniques: Accents, natural harmonics
Comments: Here is another beautiful Rieding concertino, this time with a bold Hungarian flavor. Beyond learning the notes, focus on bringing out the accents and syncopations to really fulfill the piece’s character.
#8 Jean Baptiste Accolay: Violin Concerto in A Minor (1868)
Length: 8 minutes (1 movement)
Positions: 1st-5th
Important techniques: More complex shifts, double stops, off-beat accents, saltato, cross-fingerings (i.e. quickly changing accidentals)
How to Practice: Isolating the shifts is very important for this piece, as well as practicing the slurred sixteenth-note runs in stopped bows and rhythms. Improve the accents by using slightly more bow and pressure on the accent with a little extra vibrato. For the saltato, practice slowly with very loose flexible bow hand fingers. The bounce will come naturally as you increase the tempo.
Comments: A popular bridge between student concertos and mainstream repertoire, the Accolay concerto takes a step into more complex shifting and bowing techniques. It alternates between flowing melodies and technical passages, packing a lot of important techniques and contrasts into just eight minutes.
#9 Joseph Haydn: Violin Concerto No. 4 in G Major (1761)
Length: 17 minutes
Positions: 1st-3rd
Important techniques: Double stops, cadenzas
Comments: This charming baroque concerto is a fan favorite. The opening movement flows like a joyful, babbling brook, leading to a gentle middle movement and a jubilant conclusion. It is a good introduction to the world of Bach, Haydn, and Mozart concertos.
#10 Dmitry Kabalevsky: Violin Concerto in C Major (1948)
Length: 18 minutes (depending how fast you want to play) (3 movements)
Positions: 1st-7th
Important techniques: Rapid string crossings, pizzicato chords, double stops, collé
How to Practice: Many people struggle with how to play pizzicato chords loudly. Here’s a helpful trick: pluck all the strings at once, over the fingerboard, but diagonally leading away from the bridge. This will help the strings resonate better. The fast arpeggios are also difficult—practice slowly in martelé keeping the bow in constant firm contact with the string.
Comments: Kabalevsky was a wonderful Russian composer who dedicated his life to writing actually beautiful, intriguing pieces for children. Although not officially called a student concerto, his violin concerto is often used that way. However, it has such artistic merit that it has also been recorded by artists such as David Oistrakh, Gil Shaham, and Pinchas Zukerman.
#11 W.A. Mozart: Violin Concerto No. 3 G Major (1775)
Length: 25 minutes (3 movements)
Positions: 1st-5th
Important techniques: Requires an advanced understanding of stylistic phrasing
Comments: Any professional violinist will tell you that Mozart concertos are deceptively difficult. The notes of this concerto are manageable, but it requires pristine clarity and stylistic nuances. Even so, Mozart concertos are essential for every violinist’s repertoire, and this concerto is the best place to start.
#12 Joseph Haydn: Violin Concerto No. 1 in C Major (1760s)
Length: 30 minutes (3 movements)
Positions: 1st-7th
Important techniques: Slurred double stops, complex rhythms, string crossings,spiccato
Comments: This is the fiery older sibling of the G major concerto. It is regularly performed by high-level soloists, and is one of the most famous Baroque violin concertos. The cadenzas build on the techniques included in the piece itself.
#13 J.S. Bach: Violin Concerto in E Major (year unknown)
Length: 15 minutes (3 movements)
Positions: 1st-5th
Important techniques: Cross fingerings, double-sharps
Comments: You knew that in a list of thirty violin pieces Bach was going to come up eventually. His concertos are often perceived as student concertos but they certainly weren’t intended that way. Only three of his violin concertos survive, and the E Major is a particularly cheerful example. It is not known for certain when he wrote it, but it was probably while he worked for Prince Leopold in Köthen, or else during how later years in Leipzig.
#14 Giovanni Viotti: Violin Concerto No. 22 in A Minor (1803)
Length: 28 minutes (3 movements)
Positions: 1st-6th
Important Techniques: Trills, double stops, bariolage
Comments: Viotti wrote, get this, 29 violin concertos. Only 22 and 23 are generally performed, but a violinist named Franco Mezzena recently recorded every concerto so they aren’t forgotten. There are certain difficulties, including several cadenzas in the second movement especially. The bariolages are challenging because they cross back and forth from the E string to the G string. It is also excellent practice for thirds. Although it is not among the most famous today, it was Johannes Brahms’s favorite violin concerto.
#15 W.A. Mozart: Violin Concerto No. 5 in A Major (1775)
Length: 28 minutes (3 movements)
Positions: 1st-9th
Important Techniques: Extended 4th finger, clear dynamic changes, stylistic phrasing
Comments: In all of Mozart’s work, clarity, poise and intentionality are crucial. This beloved concerto is particularly challenging for intonation due to its extended fourth fingers, fast shifts through many positions, and brilliant trills, not mention the cadenzas.
#16 Antonio Vivaldi: The Four Seasons (1718-1720)
Length: 50 minutes (4 concertos, 3 movements each)
Positions: 1st-6th
Important Techniques: Arpeggiating, double stops, being able to read and play 32nd-note passages
Comments: I ranked this one high on the list mostly because of its length (if you’re playing all four concertos) and because of its incredibly flashy passagework. However, there are several individual movements that are not as difficult. For many players, this is one of the first introductions to reading long passages of thirty-second notes. The secret here: use a metronome!
#17 Max Bruch: Violin Concerto No. 1 in G Minor (1866-67)
Length: 25 minutes (3 movements)
Positions: 1st-10th
Important Techniques: Chords, thirds, very long runs, cadenzas, trills
Comments: This concerto is so loved that it is performed constantly by students and professionals alike. It is beautifully melodic, making it easier (and perhaps more enjoyable) to learn than some other big concertos, but it still requires a lot of skill. If you are looking for your next step into major violin concertos, Bruch is always an excellent place to go. (Check out also his Scottish Fantasy).
#18 Camille Saint-Saëns: Violin Concerto No. 3 in B Minor (1880)
Length: 35 minutes (3 movements)
Positions: Basically all of them. Particularly on the E string, yikes!
Important Techniques: Shifting high on the G string, using all positions on the E string, double stops, chromatic passages, false harmonics
Comments: Another concerto not very well-known among non-violinists that deserves to be heard more often. The end of the second movement is both hauntingly beautiful and difficult to execute: It is a series of arpeggios played entirely in false harmonics that must be flawlessly in tune.
#19 Samuel Barber: Violin Concerto (1939)
Length: 23 minutes (3 movements)
Positions: 1st-12th
Important Techniques: Long legato phrases, chromaticism, spiccato especially in third movement.
Comments: Few pieces ever composed can match the lush gorgeousness of Barber’s violin concerto. He composed the first two movements together and added the third later, which is why it is so different. Students often learn the first movement only because the finale is literally five straight pages of spiccato triplets at break neck speed. The notes are not terribly difficult once you understand the patterns, but it does require many hours of slow, focused practice.
#20 Edouard Lalo: Symphonie Espagnole (1874)
Length: 23 minutes (5 movements)
Positions: Full range
Important Techniques: Fast legato slurred passages, high positions, jump shifts, harmonics, double stops
Comments: The opening of this concerto is extremely famous, jumping from third to twelfth position in only two octaves. The feisty Spanish flair of this piece brings with it many challenges for both the right and left hands, which must work together to create dramatically articulated passages. Every movement has a slightly different tone and character that must be expressed.
#21 Henryk Wieniawski: Violin Concerto No. 2 in D Minor (1856?)
Length: 25 minutes (4 movements)
Positions: Full range
Important Techniques: Upbow staccato, spiccato, rapid string crossings
Comments: You’ve probably noticed by now that many of the techniques listed overlap between concertos. (This is why it is soo helpful to practice etudes.) However, this concerto is famous for a very specific reason. The end of the first movement is full of descending upbow staccato scales, a very difficult and impressive technique.
#22 Felix Mendelssohn: Violin Concerto in E Minor (1838-44)
Length: 33 minutes (3 movements)
Positions: Full range
Important Techniques: Ricochet, octaves, spiccato, thirds
Comments: Another must-learn, the Mendelssohn is usually considered among the four greatest concertos ever written. Like the Mozart it requires constant precision and delicacy. The extensive cadenza in the first movement that melts effortlessly back into the main theme is one of the most beautiful parts of this piece and one of the most difficult.
#23 Peter Tchaikovsky: Violin Concerto in D Major (1878)
Length: 35 minutes (3 movements)
Positions: At this point in the list, all of them from here on out.
Important Techniques: All the previous challenges mentioned, including fast chromatic runs, jump shifts, many types of chords, and cadenzas
Comments: This emotional concerto takes a huge leap beyond Mozart and Mendelssohn into romanticism. The orchestral accompaniment becomes more intense, the solo line less predictable. However, unlike experimental concertos that came afterwards it still maintains its harmonic and melodic structure while pushing the abilities of the player. As an aside, the second movement is a lovely solo piece alone that is not nearly as difficult as the outer movements.
#24 Dmitri Shostakovich: Violin Concerto No. 1 (1947-48)
Length: 38 minutes (4 movements)
Positions: Much of it stays in the lower positions but it does utilize the high registers of the E string.
Important Techniques: Spiccato, chords, false harmonics, chromatic finger-sliding (for lack of a better term)
Comments: This unusual concerto may not be everyone’s cup of tea. It is intentionally dissonant and ambiguous, creating a very different mood than Tchaikovsky’s. On the page there appear to be fewer notes than in most major concertos. The unusual intervals and chromatic runs are what make it challenging. This is a great concerto for stretching yourself and breaking out of the strictly classical/romantic norm.
#25 Jean Sibelius: Violin Concerto in D Minor (1904-05)
Length: 32 minutes (3 movements)
Positions: Full range, including very high on the G string
Important Techniques: Reading complex rhythms, complex chords and shifting, extremely specific technical markings
Comments: Sibelius dreamed of being a concert violinist, and when that didn’t work out he settled for writing an insanely complex violin concerto. In fact, the original version was so difficult that he had to edit it. Additionally, he put in extremely specific markings, both symbols and words, because he wanted everything a certain way. This makes the sheet music look…crowded. Simply deciphering everything on the page is the first step before learning the notes!
#26 Nicolo Paganini: Violin Concerto No. 1 in D Major (1816)
Length: 36 minutes (3 movements)
Positions: Full range
Important Techniques: Thirds played as spiccato sixteenths (ouch), ricochet, upbow staccato, jump shifts
Comments: Paganini wrote six violin concertos, but this is certainly the most performed. There is an incredible range of emotions: joyful, playful, cute, angry, and flamboyant. Like basically everything else Paganini wrote, it requires incredible dexterity, and the cadenza written by Sauret is one of the hardest cadenzas ever.
#27 Johannes Brahms: Violin Concerto in D Major (1878)
Length: 40 minutes (3 movements)
Positions: Full range
Important Techniques: Being able to stand there for two minutes listening to the orchestra play and then suddenly be like “Ooh yay, I get to play octaves now!”
Comments: Brahms’ violin concerto is reminiscent of a symphony. Several concertos, such as Sibelius and Mozart No. 5, have a slow, graceful introduction before the main theme. This both creates a beautiful transition and allows the player to briefly warm up his fingers. In Brahms, after two minutes of orchestra introduction, the fireworks start immediately.
#28 Ludwig van Beethoven: Violin Concerto in D Major (1806)
Length: 46 minutes (3 movements)
Positions: Almost full range
Important Techniques: Octaves, long legato slurred sixteenths, incredible memorization abilities
Comments: The Beethoven is more classical, so it doesn’t look as difficult as the other concertos high on this list. Yet it combines the precision of Mozart with the stamina needed for Brahms. The soloist gets very few breaks. The third movement, which is a rondo where the theme repeats periodically, requires excellent memorization skills so you don’t repeat the same thing too many times!
#29 Jennifer Higdon: Violin Concerto (2008)
Length: 32 minutes (3 movements)
Positions: All of them. Just all of them.
Important Techniques: False harmonics, difficult double stops, very very fast passage work while doing double stops/ trills, etc.
Comments: Higdon wrote this concerto for Hilary Hahn and it won the Pulitzer Prize for music in 2010. It has three unusually named movements: “1724”, the address of the Curtis Institute of Music where Higdon works, “Chaconni”, and “Flying Forward”. All three movements are very innovative, and the last is an intense showpiece. This concerto is distinctly modern, but still impressive and enjoyable when understood in its context.
#30 Grażyna Bacewicz: Violin Concerto No. 3 (1948)
Length: 24 minutes (3 movements)
Positions: Please don’t make me think about it.
Important Techniques: Double stops, fast runs, trilled glissandos, cadenzas, weird shifts
Comments: I almost guarantee you’ve never heard of this concerto, and I don’t know anyone personally who’s played it. Bacewicz is one of the only internationally-known Polish women composers. She was also an accomplished violinist so many of her compositions feature violin. This piece is very modern and other-worldly, but doesn’t quite embrace atonalism. I put it this high on the list because of its lack of clear melodic lines make the fast runs and shifting even more difficult to learn and habituate.
#31 György Ligeti: Violin Concerto (1992)
Length: 28 minutes (5 movements)
Positions: Just…don’t ask.
Important (or just plain weird) Techniques: Ligeti utilizes the overtone scale using harmonics. Because of this, the concertmaster and principle violist have to retune their violins so that they will be in tune with the natural harmonics.
Comments: I looked around a lot and I literally could not find a concerto harder than this. If you can think of one, please of leave it in the comments! It pushes the extreme limits of the instrument.. Imagine Paganini but in the late twentieth century. There are very unusual sound effects throughout that you would never expect possible in a violin concerto. Even superstar violinist Augustin Hadelich says that the cadenza, written by Thomas Adès, is one of the hardest things he’s ever had to learn.
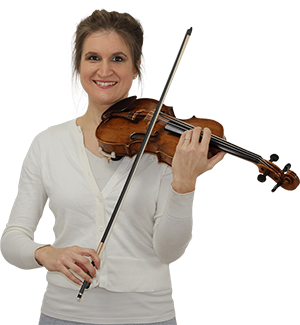
Hi! I'm Zlata
Classical violinist helping you overcome technical struggles and play with feeling by improving your bow technique.
There’s my list of 30 violin concertos ranked from easiest to hardest!
I hope you enjoyed listening and learned a lot about what violin concertos there are and what makes them difficult to play (or not).
If you were to add some, where would you put them? Would you change anything about the list, and what do you think is the hardest violin concerto ever? Please let me know in the comments!
If you’re an intermediate or beginner violinist looking for more student concertos then check out my list with 107 easy violin concertos including free violin sheet music downloads right here.

