Violin Scales: Learn the Most Common Scales on the Violin

Violin scales with free sheet music, finger charts and audio samples

Practicing scales on the violin is very important to:

  • learn to play in tune (improve intonation)
  • practice different bowing techniques
  • improve your rhythm skills
  • finger speed, flexibility and strength

Actually there’s nothing you can NOT learn with scales. You get to know the violin fingerboard, where all the notes are and in general scales are a laboratory to improve all aspects of your violin playing.

If you start each practicing with scales, you’ll notice that your overall violin technique improves and you can learn all the piece you love to play faster and better.

I’ll dive right into the most commonly used violin scales. General information about what a scale is and how to practice them comes later in this article. Just scroll and jump to what you’d like to learn first.


A Major Violin Scale

This is the first scale almost all violinists learn and a very comfortable key to play in. It has three sharps, F#, C#, and G#.

Beginner A Major One Octave Violin Scale

(Sensational Scales p. 2-4)

Start on open A. The fingering pattern is easy here because you just have to follow the tapes if you have them. If you don’t have tapes, make sure your high second finger always touches third finger. For the E, you can choose whether to play four on the A string or open E string.

Sensational Scales includes exercises in broken triads. These are the exact same notes and fingerings, just in a different order. Start on A, skip up to C#, come back down one step to B, skip up again, etc.

Intermediate A Major Two Octave Violin Scale

(Sensational Scales p. 16-17)

Here we add the lower octave on the G and D strings. Start on 1st finger G string. The fingering is pretty simple, just make sure to play high 3’s on the G and D strings. Everything else is the same, no shifting is necessary. Also try the bowing variations given in the book.

Advanced A Major Three Octave Violin Scale

(Sensational Scales p. 58,71)

This advanced scale requires shifting up to third, fifth, and seventh position. For most accurate results, always slide the shift carefully, never jump or jerk. The book gives two different options for fingerings. The Carl Flesch fingering is the most common. Experiment with both to become a flexible player.
The arpeggios here cycle through both A major and A minor.

Pro A Major Four Octave Violin Scale

(Sensational Scales p. 79)

A Major is one of the few scales that violinists can actually play in four octaves. That last A is one of the highest notes on the violin. Four octave scales don’t come up in sheet music very often, but examples in A major are the opening of Paganini Caprice No. 5 and the last few lines of Saint-Saëns Introduction and Rondo Capriccioso. If you hope to play this repertoire someday, brushing up on your four-octave scales would be a good idea.

Fingering-wise, once you get to third position A on the E string, just keep going up 1-2-1-2 until you get to the D in 13th position. Play the last five notes 1-2-3-4-extended 4 for the last A. Bring the four back to G. After that, it’s just 3-2-1 shifts all the way down the E string.

G Major Violin Scale

G major has one sharp, F#. It is the second key most violinists learn to use.

Beginner G Major One Octave Violin Scale

(Sensational Scales p. 2-4)

This scale starts on open G, the lowest note on the violin, and goes up to 3rd finger D string. Play high 2’s on both strings. You may notice this fingering is exactly the same as A major one octave, just starting on a lower string.

Advanced G Major Three Octave Violin Scale

(Sensational Scales p. 56,79)

G major is the easiest three octave scale since it starts on teh lowest note, so you don’t have to shift very high. Just shift to third position on the A string, then 5th position on the E string, and extend 4 for the top G. When shifting down, go straight from 5th position to 1st position on the E string. Remember to always shift carefully and smoothly.

D Major Violin Scale

D major has two sharps, F# and C#, and is the next easiest scale for beginners.

Beginner D Major One Octave Violin Scale

(Sensational Scales p. 2-4)

This is the exact same fingering pattern as A major and G major, just starting on the open D string.

Advanced D Major Three Octave Violin Scale

(Sensational Scales p. 63,76)

G, A♭, and A major all have their own fingerings. However, it is possible to play every other major scale with the exact same fingering, always starting with two on the G string. Then shift once on the A string, twice on the E string, then extended four on the top note. Refer to page 63 of Sensational Scales to understand this. Once you nail this fingering, you will be able to learn different scales much faster.

C Major Violin Scale

C major is the major key with no sharps or flats. On the piano you play this key easilly with just the white keys. As the violin is tuned in fifths however, we have different finger frames in this scale and it’s not the easiest scale even thought the key seems easy.

Beginner C Major One Octave Violin Scale

(Sensational Scales p. 5-7)

For this scale, you will need to use low 2nd finger, so make sure your 2nd finger touches your first finger when you put it down. Begin with 3rd finger on the G string, up to low 2nd finger on the A string. This is a really great scale to practice with drones.

Advanced C Major Three Octave Violin Scale

(Sensational Scales p. 61,74)

Use the standard fingering described above for D major. This scale starts in second position.

F Major Violin Scale

This is the only scale on this list that has a flat in the key signature, B♭. This scale is excellent for practicing low 1’s.

Beginner F Major One Octave Violin Scale

(Sensational Scales p. 12-14)

This scale might seem a bit more challenging at first, but just take it slow. This scale has B and F♮, so all the 1st fingers should be low. Place your finger behind the first-finger tape just a tiny bit above the nut. Use a drone if you have trouble playing those notes in tune.

Advanced F Major Three Octave Violin Scale

(Sensational Scales p. 66)

Here you can still use that standard three-octave fingering, but it starts up in 5th position. This might feel uncomfortable at first, but it’s a great scale for practicing intonation in high positions and really strengthens your fingers. Remember to bang your fingers down to help the notes speak.

FREE Violin Scale Book

All the sheet music you see in this article came from my book Sensational Scales. It’s a 85 page violin scale book that goes from simple beginner scales all the way to all three octave scales and arpeggios.
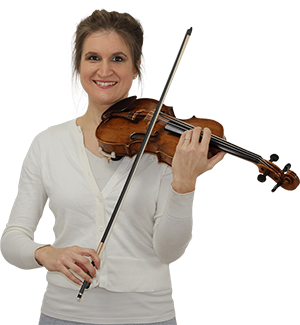
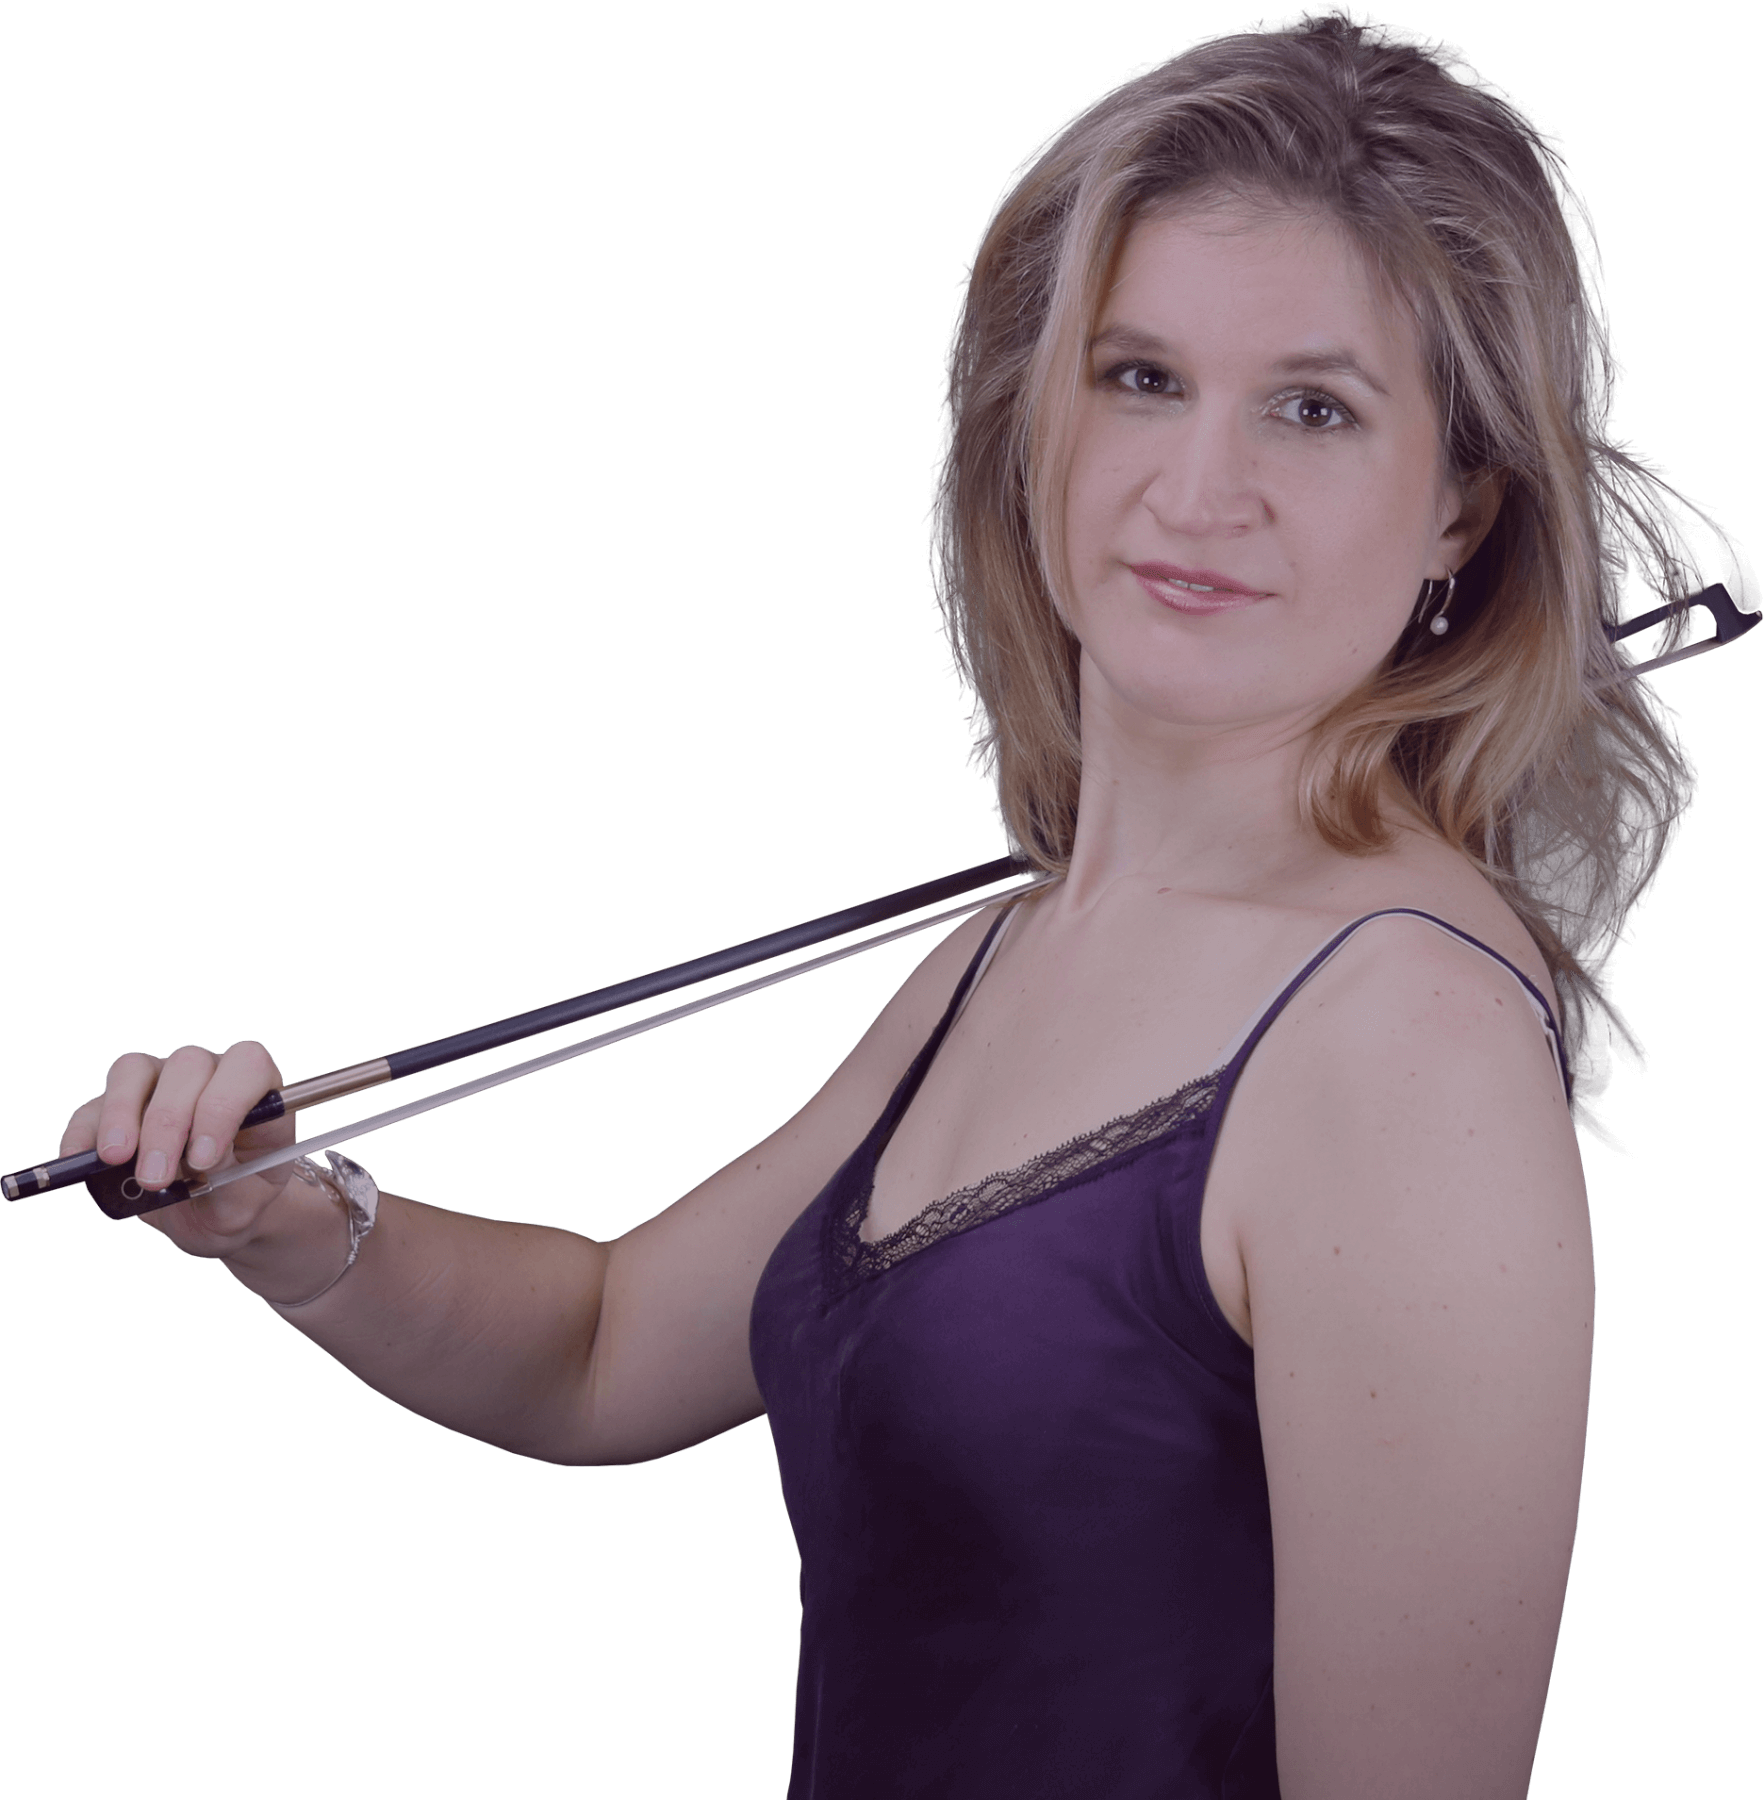
The beginner scales go together with finger charts, so even if you’re not that comfortable with reading notes, you can follow along.

Unique about this book is that it’s not ordered per key, but per finger frame and level of difficulty. It will take you through all the scales step by step. You know exactly what to do in your violin scale practice.

And the price? It’s FREE!

What is a violin scale?

A musical scale is any set of notes arranged in ascending or descending order. For example, if you want to start a scale on the note C, all the other notes must be played going up or down from C. There is no jumping around or changing directions.

Complete scales, as they are written in exercise books, typically begin and end on the same letter name, but if you look at any sheet music, you will often see little runs of anything from four to twenty-four notes. Although these passages can look intimidating, they are usually based on some sort of scale, so practice scales diligently in order to play these runs with ease.

So if a scale is a set of notes arranged in a particular order, how do we know how close together to put the notes? All western music is built on steps. There are just two kinds, half-steps and whole-steps. If you were to start at the bottom of a piano keyboard and go up playing every single key, you would be playing half-steps. If you count the half-steps between middle C and the C one octave higher, there are 12. (Note: in music we ALWAYS count the first note we play as step 1.) A whole-step is two half-steps put together.

Most scales are a specific combination of half-steps and whole-steps. Although there are many different types of scales, in this article we will only mention the two most common, major and natural minor. The steps of a major scale are WWHWWWH. The steps of a minor scale are WHWWHWW. For example: for the C major scale, start on a C, go up one whole-step to a D, another whole-step to an E, etc. For a C minor scale, go up one whole-step to a D, one half-step to an E♭, one whole-step to an F, and so on. So even though there are twelve steps in an octave, most scales will only use eight of those steps. Let’s look at the steps of the major scale, as that’s the first scale you’ll learn on the violin:

Why Practice Violin Scales?

Good question. Violin-playing is supposed to be fun right? Well the catch is that the better you sound the more fun it is, and the number one way to improve nearly every aspect of your technique is through regular, intentional, and focused scale practice.

When done well, scales can improve tone quality, rhythm, speed, bow control, intonation, shifting, flexibility, articulation, sight-reading… I get excited just thinking about it! If you’re still not convinced, challenge yourself for thirty days to dedicate a specific amount of practice time to scales. Record how your pieces sound both before and after this experience. I promise you won’t be disappointed.

How to Practice Violin Scales?

The main reason most students dread scales is because they don’t have a logical or effective scale practice routine. They don’t know how to use scales to challenge themselves, and therefore end up just repeating the same old exercises and habits for months or years!

If you are focused and make a plan, you will notice your violin scales improving on a daily basis.

Tools that help you practice violin scales

Metronome

The first of course is a metronome. Metronomes are the best goal-setting device musicians have. Start at a manageable tempo, and ramp it up very gradually each time. This is one of the most effective ways to train speed and consistency. Use my free online metronome right here.

Play violin scales with a drone

Another great exercise is practicing scales with a drone playing. The drone can be played either by another (very obliging) musician or a tuner app on your phone. Set the drone to the first note of your scale then play very slowly to check the tuning of every note.

A bit more difficult, but even better, is to play the drone yourself by playing a lower or higher open string along with your scales. I explain more about practicing violin drone scales in this video.

Different bowings

Speed and intonation are the things most people focus on when they play scales, but scales are useful for so many other techniques as well. For example, try practicing scales with increasingly more challenging bowings. The Carl Flesch scale system covers a plethora of advanced bowings, but it’s best to keep it simple and clear first. After mastering one note per bow, try two, then four, then eight, twelve, etc. Continue this pattern (with a metronome!) until you can play the whole scale up and down in one bow. Advanced players often practice doing three-octave scales up and down twice. That’s 84 notes in one bow!

Rhythmical variations

In order to play that many notes so quickly, however, your articulation must be excellent. That’s where practicing with rhythms comes in. Play strong, separate bows and alternate the length of the notes: long short, long short. Make sure the short note is very crisp and clean, shorter than a sixteenth note even. Bang your fingers down (I mean it) on the short notes, and move the bow quickly. Then reverse the pattern: short long, short long. When you put the scale back together normally, your finger dexterity and clarity will have greatly improved.

Bow distribution

The last important thing I’ll address is bow distribution. Many beginners do not think about how much bow they are using for each note. Try to play scales using the entire bow. If you are playing with slurs, make sure to divide the slur exactly in half, meaning if you are slurring eight notes you play four in the top half and four in the bottom half. Practicing bow distribution will help you have a smooth, full tone.

What are arpeggios on the violin?

If you download the Sensational Scales book, you will see that every scale also includes arpeggios. An arpeggio is just a broken chord. For example: the notes of a C major chord are C, E, and G. So to play the C Major arpeggio you would play just those notes up and down the violin. There are many types of arpeggios since you can base them off of any chord.

Chords vs Arpeggios

A chord is when you play several steps (notes) of a scale (for example the first, third and fifth) together at the same time. On a guitar or a piano it’s very common to play chords, but it’s also possible on the violin. Did you know you can play three notes (strings) at the same time on the violin? We call this a triple stop.

On the violin chords are often played ‘broken’. This means you first play the lower two notes together (double stop) and then the two highest notes of the chord or just the highest note.

An arpeggio is when you play the same notes as you would in a chord, but you don’t play them at the same time. You play them one by one, for example: the first note of the scale, then the third and then the fifth. You can play this back and forth.

Chords and arpeggios have the same notes from the scale, but you play them in a different way.

Hi! I'm Zlata

Classical violinist helping you overcome technical struggles and play with feeling by improving your bow technique.

Congratulations on learning the five most useful major scales on violin!

No matter how long you’ve been playing or what level you’re at, improving your scales is the best step to improving your overall violin skills. After learning these five, check out Sensational Scales for comprehensive exercises and explanations of all violin scales.

What’s the best violin scale book?

To practice violin scales, you need a good violin scale book. There are different ones on different levels and with pros and cons.

In this article I describe seven violin scale books, so you can decide what’s the best scale book for you!

7 Best Violin Scale Books

Improve your violin technique with scales!

Practicing scales is great to improve your intonation, bowing technique, confidence on the fingerboard and violin playing in general

Like Itzhak Perlman points out in his masterclass I followed, scales should be part of your daily practice routine to get to know the fingerboard and play in tune confidently. When Heifetz tested him at the age of fourteen, he had to play scales to really test his violin technique.

Music is made out of scales

If you have scales, arpeggios and double stops in your fingers, it will take so much less time to practice a new piece of music. You can focus on expression and musicality much earlier without getting lost in the technique.

What scales should you practice?

According to Itzhak Perlman’s practice schedule, you spend around a third of your practice time on scales.

Each day you can:

  • Practice a different scale each day to maintain and improve your technique in general.
  • Pick a particular exercise, like scales in octaves, and play them in each key.
  • Do various exercises in the key that matches the piece you’re currently playing.
  • Apply different bowing techniques to (for example) a three octave scale.

This all depends on your level of playing and what you want to improve on right now. Never practice scales mindlessly. Always have a clear goal in mind and correct yourself like you’re your own teacher standing in the room.

Beginner to Intermediate Violin Scale Books

When you’re new to the violin, complete advanced scale books like I mention later in this article, might be very intimidating.

As a beginner or intermediate violinist, you might want to look into a scale book that’s more of a curriculum and tells you exactly what to start with and which scale to practice next. You want a scale book in order of difficulty.

Sensational Scales

Please forgive me for tooting my own horn, but I’d like to start with my own free violin scale book Sensational Scales. Not because I have the arrogance of thinking it’s the best (don’t worry, I don’t). I just to give you a free possibility right away to get you started with violin scales today.

With my students I’ve always missed a book that takes them from first scales in the first position to all three octave scales and beyond. Easy scale books were too easy, but complete scale books like you see later in this article were too difficult and intimidating.

I wrote a scale book that is based on sequence of finger patterns you learn in the first years of violin playing

In this way the scales will match the method book you’re working from and will feel logical to you.

In the book I’ve included fingerboard maps for each scale that show you exactly where to find the notes in the violin

In that way you never have to guess if it’s a large or small distance.

After this book you can move up to a complete scale method like the ones described below.

The best part about my scale book is that it’s FREE. Click here to download the PDF.

Serrano – Learn Music Theory & Violin Scales

A Fun & Comprehensive Approach To Learning Theory & Violin Scales

If you’re looking for a violin scale book that not only gives you the sheet music for all the violin scales, but also teaches you about music theory, this book ‘Learn music theory and violin scales’ by Amy Serrano is the best book I can recommend.

It’s very easy to understand and shows you finger charts, circle of fifths and all the violin notes in the scales. You learn exactly what the different scales are and the distances between the notes. At the same time you’ll really understand scales, chords, keys and arpeggios. It goes up to three octave scales, so this book can guide you on your violin journey for many years.

A cool thing is that she not only covers major and minor, but also goes into ‘sassy scales’ like blues scales, which is great for violin players of today who not only play classical music. Click here to buy!

Hrimaly – Scale-Studies for the Violin

This is also an accessible scale book to start out with. It’s categorized per exercise and shows them in all keys. In this way it’s different from Sensational Scales, which works from the finger pattern sequence you learn.

This book teaches you up to three octave major scales and prepares you very well for these throughout the book. I also like the great number of bowing variations this book offers.

The downside of this book is that it starts with very simple exercises, but it gives them in all keys. As a beginner you must be able to judge which keys you can play with the finger patterns you’ve learned. Also you don’t know for sure if you’re playing the right notes, as there are no fingerboard maps.

This is a great book if you’re working with a private teacher and he/she can guide you by pointing out the scales you should practice and correct you along the way.

Click here to get the Hrimaly violin scale book.

Advanced Complete Violin Scale Books

When you’ve worked through your first scale book and know how to play in different keys and positions, it’s time to get yourself a complete violin scale book.

For the rest of your life you’ll have a love-hate relationship with this book.

Flesch – Scale System

This is the book I grew up with. It’s very complete and organized per key. You can pick for example the key of the piece you play and do all kinds of scale exercises in it.

It starts with one octave scales, arpeggios and broken thirds in one octave on one string. After that the same in three octaves on multiple strings (I love the fingering), thirds, sixths, octaves, fingered octaves, tenth’s, harmonics and double stops in harmonics.

The only downside might be that there are not much bowing and rhythm variations, but I was always used that my teacher gave me assignments about this.

Click here to buy the Flesch violin scale book in the edition I recommend.

Galamian – Contemporary Violin Technique

A very complete scale method that I can warmly recommend!

Volume 1 includes scales organized per exercise. So each exercise (like scales on one string) is given in each key. Flesch is organized per key and gives all exercises in that key. It depends on your practice strategy what you like best. Of course it’s handy to have both variations, so you can do both.

Good thing is that this book also includes the four octave scales!

The book includes an insert with bowing and rhythm patterns that you can apply to the scales. Very useful!

Volume 2 is focussed on double and multiple stops in scale and arpeggio exercises.

I recommend buying both volumes including the bowing and rhythm patterns. Click here to buy volume 1 and here to buy volume 2.

Sevcik – Scales and arpeggios

Just as Galamian this book is organized per exercise and gives this exercise in all keys. It walks you through the positions with specific scale exercises for each position. Sevcik includes bowing patterns throughout the exercises, so you don’t have to look them up separately.

I know a lot of accomplished violinists who grew up with Sevcik instead of Flesch. This can differ per country. I’d say you play the same things in both, but the difference is that you can either do all exercises in one key (Flesch) or do one exercises in all keys (Sevcik).

Sevcik is organized in a clear way and you can easily find the exercise or position you’re looking for.

Click here to buy the Sevcik violin scale book.

Hi! I'm Zlata

Classical violinist helping you overcome technical struggles and play with feeling by improving your bow technique.


Schradieck – School of Violin Technics

This is a great bundle of the three violin technique books by Schradieck and his scale studies book.

Book one gives dexterity exercises in various postions, which are great to improve the confidence, speed and flexibility of your left hand. Really helpful!

Book two gives exercises in double stops. Practicing double stops is so great for your intonation and left hand technique in general.

Book three is all about bowing exercises.

The three books total 100 pages of great violin technique exercises. You might want to get these in addition to one of the above scale books.

After the three books you’ll find a full scale book. It’s good, but not so comprehensive as the three books mentioned above.

With this bundle you’ll have a complete encyclopedia of violin technique. As the scale book is a bit limited I recommend getting this bundle as an addition to one of the three books mentioned above.

Click here to buy the Schradieck bundle.


What violin scale book do you use?

Do you practice scales on a daily basis? Let me know in the comments below what book you use and what your scale practice strategy is at the moment.

Being grown up with Flesch and used to practicing lots of things in one keys a day, now I’m using Sevcik to become more flexible in changing between keys. There were times I practiced scales for almost two hours a day, but to be fair those days are gone, haha! I use scales a (almost) daily warm up at the moment.

Stradivarius violins: why are they so special and expensive?

How many Stradivarius violins are there, how much do they cost and why? What’s so special about them?

When you learn something about violins, you probably came across the name Stradivarius and know that they are very special. In this article I answer the questions I get most from my students about Stradivarius violins.

What is a Stradivarius violin and who was Stradivarius?

A Stradivarius violin is one that was made by Antonio Stradivari, who was an Italian luthier (violin-maker) who lived from 1644 to 1737.

Historians hypothesize that Stradivari began his violin-making career when he was around 12 years old, studying with another famous luthier, Nicola Amati, although there is some debate around this topic because of differences in their craftsmanship. Stradivari’s violins lack a small dorsal pin (a small hole just underneath the arching), a common characteristic of Amati’s violins and all of his well-known pupil’s instruments as well. Compared to Amati’s, Stradivari’s violins also have stronger builds, less rounded curves, and the purfling is set farther in. If Stradivari did not study with Amati, he most likely was a student of Francesco Rugeri, another well-known luthier of the time.

antonio stradivarius violin maker

Stradivari most likely produced his first decent instrument in 1660 at the ripe old age of 16! He quickly gained notoriety as a high-quality luthier, which allowed him to take a more experimental approach to violin making. Stradivari is credited with several design innovations and refinements that helped bring the violin into its modern form. These include: creating the modern form of the violin bridge, deepening the color of the varnish, and setting the proportions of the modern violin, with a shallower body that creates a more powerful sound than those that came before him.

Stradivari’s ‘Golden period’

The period of 1700-1725 is known as Stradivari’s “Golden Period”, in which he created his highest caliber of instruments. This is of course due to his increased experience with violin making, but his notoriety, which brought him financial gain and therefore helped him purchase higher quality materials, such as better wood and varnish, also played a part. Instruments produced during Stradivari’s Golden Period are the most sought-after and most expensive of his violins. The instruments made after this period show signs of his advancing age; they are less beautiful, heavier, and the craftsmanship wasn’t as refined (although the sound is still incredible!)

What’s the difference between Stradivarius and Guarneri violins?

You may have heard of violins made by Giuseppe Guarnerius, commonly called Guarneri’s. Stradivari and Guarnerius were contemporaries who both made superior quality violins, that differ in a few ways.

Stradivari is known to have executed his violins with excellent physical elements. His violins are perfectly symmetrical, and every curve was executed flawlessly.

Guarneri violins are also finely crafted, but not in the classical sense of symmetry and excellently finished details. Guarneri violins are often lopsided! Many of his violins have one shoulder that is a bit higher, the f-holes are not aligned, and neither are the two sides of the scroll.

Can you see the difference between a Stradivarius and a Guarneri?

Guarneri violins have slightly narrower and longer F-holes, a more refined scroll and typically have a slightly rounder and wider lower bout than that of Stradivarius violins. That means that the soundbox is more curved in Guarneri violins.

stradivarius vs guarneri violins

Stradivarius and Guarneri violins also significantly differ in sound

Guarneri’s tend to have a richer, warmer sound than Strads, and tend to be stronger and louder. Stradivarius violins sound more bright and crisp.

Players that prefer a darker, silkier tone are more likely to gravitate to the Guarneris, and players who prefer precision and refinement tend to prefer a Stradivarius.

Some well-known players who play (or played) on Guarneri’s include: Jascha Heifetz, Nathan Milstein, Fritz Kreisler, Eugene Ysaye, and Sarah Chang. See below for the Strad players.

How old are Stradivarius violins?

All Stradivarius violins are around 300 years old. The earliest surviving Strad is ex-Sachs Stradivarius made in 1666, making it 356 years old today (in 2022). The latest surviving Strad is the Paganini-Ladenburg Stradivarius made in 1736, making it 268 years old today (in 2022).

How many violins did Mr. Stradivari make?

Historians estimate that Stradivarius made a total of 1,116 instruments throughout his career, 960 of which were violins.

How many Stradivarius violins exist today?

Although we believe that Stradivari created 960 violins, only 650 remain today, most of which are in the hands of private collectors. There are also about 55 cellos and 12 violas made by Stradivari that still exist today.

How much is a Stradivarius worth?

Stradivarius violins sell for millions of dollars. Yes, millions with an S! The most recent sale of a Stradivarius happened just a few days ago on June 9, 2022. The auction house Tarisio sold a 308-year-old Stradivarius (made in his Golden Period) that once belonged to Toscha Seidel, a student of Leopold Auer. The instrument sold for 15.34 million dollars. This is the second-highest amount ever paid for a Stradivarius, with the highest being 15.9 million dollars paid for the “Lady Blunt” Stradivarius in 2011.

Why are Stradivarius violins so expensive?

There are four main reasons why Stradivarius violins are so expensive.

Supply and demand. There are a finite number of Stradivarius violins left and no more can be made. Simple economics tells us that when the demand outweighs the supply, the value increases.

The quality. As we previously discovered, musicians believe that Stradivarius violins are the highest quality instruments available to the public.

The condition and history of the instrument. Any Stradivarius violin that exists today is around 300 years old, making it a significant historical artifact. The better the condition, the higher the price.

Stradivarius violins are a status symbol. Since they are so rare and expensive, owning a Stradivarius is definitely a status symbol. They are also a great investment as they will never decrease in value.

How can I tell if a violin is a real Stradivarius?

How can you spot a Strad and know if you happen to have one in your attic?

Nowadays, there is certainly no shortage of violins bearing the name “Stradivarius”. It is very common for makers to model their violins after Stradivari in hopes of boosting their sales!

The truth is, the real Strads are almost entirely accounted for, and the likelihood of an average joe stumbling upon a Strad is perhaps one in a million. This is not to say it’s impossible, just extremely unlikely.

The only way to tell for sure if a violin is a real Stradivarius is to have it examined by a high-quality luthier, however here are some common characteristics of a real Strad label. For the date, Stradivari only printed the first digit “1” and the last 3 digits were handwritten. Towards the end of his life, he would also mention his age, writing things such as “I made it in my 89th year”, written in German. If your violin label does not have these characteristics, it is definitely not a Strad!

Who owns a Stradivarius violin?

The majority of Stradivarius violins belong to either museums or private collectors, who often loan the instruments to well-known violin soloists.

Below are some famous violinists who play on Strads:

  • Anne Sophie Mutter actually alternates between two Stradivari: the Emiliana (1703) and the Lord Dunn Raven (1710).
  • Itzhak Perlman owns the Soil Stradivarius (1714), formerly owned by Yehudi Menuhin.
  • Joshua Bell owns the Gibson ex-Huberman Stradivarius (1713).
  • Leonidas Kavakos owns the Willemotte Stradivarius (1734).
  • The Oistrakh Stradivarius (1671) was owned by David Oistrakh, but now resides in the Glinka Museum in Moscow.
  • The Ex-Marsick Stradivarius (1715) is owned by the Fulton Collection, but it is on loan to James Ehnes. This instrument was previously owned by David Oistrakh.
  • Maxim Vengerov owns the Kreutzer Stradivarius (1727).
  • The ex Adolf Busch (1716) is owned by David Garrett. He also sometimes plays on the San Lorenzo Strad (1718) which is owned by Georg Talbott.

What makes a Stradivarius violin so special?

Many musicians consider Stradivarius violins to be musically superior to any new instruments. Stradivarius violins obviously hold a lot of historical value, but they also have a brilliant sound, depth, and character unlike any instruments created since. But how is it possible that, despite our many technological advances, we cannot create violins that sound better than the ones created in the 17th and 18th centuries?

Scientists are still searching for the reason why Stradivarius violins are so special. An early hypothesis was that Stradivari added something into his unique varnish, but it has since been chemically tested and nothing unusual about his varnish was revealed. Scientists hypothesize that the Little Ice Age (1300-1850) may have been a factor since it would have caused the wood Stradivari used to grow more slowly, and thus be denser, creating a unique sound. They have also found that the wood Stradivari used was treated with various chemicals, such as aluminum, calcium, and copper, which may alter its acoustic properties.

Hi! I'm Zlata

Classical violinist helping you overcome technical struggles and play with feeling by improving your bow technique.

Do Stradivarius violins really sound better?

Yes and no. There is no doubt that Stradivarius violins are of extremely high quality and fine craftsmanship. They are easy to play, project well, have a sweet sound, and allow the player to create an extremely wide range of different sound colors. With that being said, Stradivarius violins are most often played by some of the most well-known and highly regarded violin players in the world. This begs the question: is it the instrument or the player?

Until recently, Strads have been thought of as the epitome of violins. There have never been and never will be instruments that compare. However, in 2012, a study was done by the research group of Claudia Fritz, CNRS researcher at the Institut Jean Le Rond d’Alembert which may contradict this long-held belief. Violinists played several different instruments, including those made by Stradivari alongside newer instruments. This study showed that violinists preferred newer instruments to famous Italian violins and were actually unable to distinguish between the two.

How to Hold a Violin Bow: 3 Easy Steps and 5 Bowing Exercises

The violin bow hold is SO important to let your violin sing

Maybe you just started playing the violin and although you know you have to start with simple songs, you do long to create such a beautiful resonant sound from your violin.

You might have tried to make some bow strokes, but it feels very uncomfortable and all tutorials out there may make your bow hold feel so unnatural.

It can be so frustrating that when your favorite violinist plays, it looks so easy, but for you it’s a struggle. This article will help you get a violin bow hold that feels great and with which your violin playing sounds great.

Let’s look at the violin bow hold from all sides

Before I go into my three easy steps to build a proper violin bow hold, let’s first see what it should look like.

Violin bow hold front

You will see that the fingers are curved and over the bow. The hand looks relaxed. The violin bow hold is slightly tilted in the direction of the tip of the bow. The fingers are flexible and can move along the bow strokes like a spring system. In this way you can bow smoothly and create a beautiful sound on the violin.

Pictured is a Franco Belgian bow hold. I will go into Russian vs Franco Belgian further in this article.

Violin bow hold knuckles

The knuckles of the hand are low and in line with the stick of the bow or slightly tilted towards the left.

violin bow hold knuckles

Violin bow hold pinky

The pinky is curved. You will notice that every bow has eight edges (octagonal) at the frog. You don’t place the pinky on the top edge, but the one just before. In that way the pinky doesn’t slip off the bow while playing that easily.

violin bow hold pinky

Violin bow hold from below

The thumb is slightly curved and not locked. It can move along smoothly with the bow strokes.

violin bow hold from below

Violin bow hold thumb

In this violin bow hold from the side you see the placement of the thumb. You don’t push your thumb into the whole of the frog. Instead you let the bow rest on the edge of your thumb nail. The thumb touches the bow just between the thumb leather and the frog.

violin bow hold side

3 EASY Steps to a Perfect Violin Bow Hold

With this step by step guide you’ll find a violin bow hold that works for YOU and your hand, so you can play the violin comfortably and beautifully.

Make sure to hold your violin bow with your left hand while you build up the bow hold with the right hand. In that way you can build up a relaxed violin bow hold without worrying that you drop the bow.

Step 1: Place your fingers relaxed and gently over the violin bow

This is not yet the correct position of your thumb and pinky, but the aim here is to build up a relaxed and proper violin bow hold step by step.

To prevent scratchy and squeaky sounds, it’s extremely important that you let your fingers rest on the violin bow.

The tip of your ring finger should be on the Paris eye.

Your knuckles should be in line with the stick of the violin bow. The fingers should be equally spaced apart and just a little bit.

Step 2: Place your thumb just between the thumb leather and the frog

The violin bow rests just on the edge of your thumb.

The edge of your thumb nail touches the violin bow stick just between the thumb leather and the frog.

You don’t need to push your thumb into the hole of the frog. That would make your bow hold very uncomfortable and tensed.

It’s personal how you place the thumb exactly, depending on the shape of your hand and your violin bow.

Make sure the ball of your thumb feels relaxed. Don’t curve the thumb too much. It should be in a slightly curved natural position.

Step 3: Place your pinky on top of the bow

Place your pinky just on the edge before the top edge of the bow. Every violin bow is octagonal at the frog.

If you place your pinky on the top edge, it will constantly slip off when playing. Very frustrating!

If you place your pinky just before, it has some stability and will stay in it’s place.

violin bow hold step 1
violin bow hold step 2

Franco Belgian vs Russian Bow Hold

The two most common violin bow holds are the Franco Belgian and the Russian bow hold. Historically this depended on where you were trained as a violinist. Nowadays we see great violinists use both bow holds not really depending on which country they are from.

Choosing between the two is a matter of trying out what first your hand best and with which bow hold you can bow the best. If you take private lessons, you can consider assuming the same violin bow hold as your teacher, because he/she can coach you better on this.

Franco Belgian violin bow hold

In the Franco Belgian bow hold the index finger rests on the bow between the second and third knuckle. Automatically the bow hold is not so much tilted towards the tip and the arm is relatively low.

In the Franco Belgian bow hold you see more finger action in the lower half of the bow as the pinky is more curved.

violin bow hold side

Hilary Hahn is a famous violinist who uses the Franco Belgian bow hold

Russian violin bow hold

In the Russian violin bow hold the index finger rests on the bow between the base knuckle and the second knuckle. The bow hold is tilted more towards the tip and the arm is automatically held higher.

The pinky is a bit straighter than in the Franco Belgian bow hold, but it’s not stiff or locked. It moves along with the bow strokes.

russian violin bow hold
russian bow hold from side

Ray Chen is a famous violinists who uses the Russian bow hold

Your violin bow hold moves while playing

Besides that a violin bow hold is highly personal and each violin player needs to find out what works best for the shape of your hand, the violin bow hold also moves along while playing.

To create a beautiful sound on the violin, one must bow smoothly and let the fingers of the bow hand move along with the bow strokes.

See the pictures below for the violin bow hold at the extreme frog and tip. Learn more about bowing smoothly in this video lesson.

Violin bow hold at the frog

At the frog you curve your fingers and bend your thumb. Your wrist goes up a bit. The balance of the bow hold is towards your pinky.

violin bow hold at the frog

Violin bow hold at the tip

At the tip you stretch your fingers without overstretching them. Your wrist goes down a bit, but never collapses.

violin bow hold at the tip

3 Violin Bow Hold Exercises for a Relaxed and Flexible Bow Hold

Now you’ve learned a good bow hold, we can do exercises to ensure that you make the right movements while bowing, so you can make a beautiful sound.

Your fresh violin bow hold might feel a bit weird and it might be hard to relax your hand and maintain a good bow hold while playing. That’s when violin bow hold exercises come in.

To bow smoothly on the violin, we should train the finger movements that you make while bowing separately.

How to practice your violin bow hold

First practice the coming exercises with a pencil, which is a lot less heavier than the violin bow. It’s important to perform the bowing exercises correctly and fluently, not to train immense strength. Training just for power, will give you a tensed bow hold.

When the exercises go well with the pencil, do them in the balance point of the bow (which is usually about 1/3 from the frog). Move bit by bit to the frog all while checking that you still do the movements relaxed and fluently. If you tense up, go back to the balance point or the pencil.

Tap the violin bow

Tap each finger a couple of times (pinky, middle fingers, index finger) while your hand is in the bow hold. This will relax your hand and train your fingers to move independently:

Bridge

There are two ways to do this famous exercise. For stability of the bow hold, do it with your lower arm and wrist. For pinky strength move just your pinky like this:

Vertical bowing movements

Practice the vertical finger action in your violin bow hold:

Horizontal bowing movements

Practice the horizontal finger action in your violin bow hold:

Circular movements

Combine the horizontal and vertical movements in a circular motion:

Pronation and Supination

You might have heard violinists say something like ‘put weight into the bow’ or ‘lift weight off the bow’.

In the standard violin bow hold the hand is tilted slightly towards your index finger. The index can be placed slightly further up the bow for more control.

Your index finger is very important while bowing. You transfer the weight from your arm through your index finger into the bow to create a full and deep sound on the violin. This feels like your arm is resting on your index finger without pushing.

Like you would turn a key to the left you can put more or less weight on the bow. By tilting the hand towards the pinky you lift weight off the violin.

It makes a lot of sense to practice this movement separately.

Hi! I'm Zlata

Classical violinist helping you overcome technical struggles and play with feeling by improving your bow technique.

Finding your Perfect Violin Bow Hold

As a beginner violinist the violin bow hold can seem simple, but it can be so hard to do yourself. Don’t worry if it takes you a long time. Building up good basics in violin playing is very rewarding over time.

All violinists need to find a violin bow hold that’s perfect for their hand. It’s highly personal. This article gives you the general principles and some great exercise to develop your natural bow hold.

Interested to learn more about violin bowing? You’ll LOVE this:

When you’re a bit used to your violin bow hold, you can focus on learning to bow smoothly and create a beautiful sound. This video is all about smooth bowing.

You might have heard of different violin bowing techniques like detaché, martelé, staccato and spiccato. What to learn first? This video teaches you all about the six basic bow strokes.

How to Rosin your Violin Bow

Learn to use rosin on your violin bow for the best sound

Choose the right rosin and rosin like a professional violinist

Rosining your violin bow is easy and a great first step on the violin. Also it’s incredibly important: without rosin your violin can’t make sound.

Help, I’ve rosined my violin bow, but it doesn’t make sound!

When you just bought a violin set, the rosin is very new, shiny and smooth. This causes the rosin to glide over the violin bow without leaving any rosin. No matter how much you rosin your violin bow, it won’t make a sound on your violin.

First make the surface of your rosin a bit less smooth by treating it with sand paper. When the surface of the rosin is a bit more rough, the rosin will leave on the bow hair when you rosin your violin bow.

Buy the right rosin for your violin and climate

When you bought a very cheap violin online, the rosin sometimes is of such a bad quality that it doesn’t function and needs to be replaced.

What rosin to buy? There’s light rosin and dark rosin.

Light rosin

Light rosin is ideal for smaller instruments like the violin and for warmer climates. The light rosin is a bit harder and not so sticky. Sometimes it’s called summer rosin.

Dark rosin

Dark rosin is bit stickier and suitable for colder climates and larger instruments like the viola and the cello. If you play violin, but live in a cold climate, dark rosin might be great.

How to rosin a new violin bow

When you’ve just bought your violin bow or when it’s just back from a rehair, you need to rosing those smooth hairs a LOT. It takes a while for the rosin to be all over the bow hair and in between the hairs to make a good sound.

You could ask your violin maker to pre-rosin your violin bow. He usually does this with powder rosin and this goes faster as the rosin will apply all between the bow hairs.

If you’re doing it yourself, just rosin the whole bow hair a lot.

How to rosin your violin bow

  1. Tighten your violin bow
  2. Start at the the frog and make small movements back and forth while applying gentle pressure to the rosin. Move over the whole bow bit by bit.
  3. Make a couple of smooth movements over the whole bow to make sure that the rosin is applied evenly

Tips for rosining your violin bow

  • When you rosin at the frog of your violin bow, hold your thumb on the ferrule of the bow. In this way the rosin can’t hit the edge of the frog of the violin and break into pieces.
  • Don’t forget to rosin the side of the violin bow hair for when you play with a tilted bow.
  • Rotate the cake of rosin regularly, so the rosin doesn’t wear down on one spot. Your cake will last longer that way.
  • A lot of players have the tendency to rosin most at the frog and the tip of the violin bow. However, rosin more where you play more. This can be the whole bow or mainly in the middle.
  • At the end of your practice session remove rosin remains from the strings and the soundbox of your violin.
  • Don’t leave your rosin in the sun. It can melt and become too soft to use well.


rosin a violin bow at the frog
rosin a violin bow at the tip

How often to rosin your violin bow

I recommend rosining your violin bow regularly, but just a little bit. In this way you’ll have about the ideal amount of rosin on your bow all the time instead of a lot just after rosining and a little just before rosining.

Rosin about every four to six hours of playing

In the end it’s personal how much you rosin. You will feel the sweet spot of the amount of rosin after some experimenting. It depends how much you rosin every time and how intensively you play.


What happens when you don’t rosin your violin bow

Without rosin the violin bow hairs are very smooth and won’t bring the strings in motion, which means you won’t produce sound.

And when you rosin too little?

You will notice that the response isn’t so good. The bow can make the violin sound, but it all feels a bit slippery and doesn’t make as much sound. Time to rosin your violin bow!

And when you rosin too much?

When you’ve overdone it, the sound will be harsh and you will see the rosin dust coming off your bow. Also bowing will feel a bit sticky.

Usually the problem will solve itself as the rosin goes off your bow while you play.

If you really want to clean off built up rosin on your violin bow hair, then watch this tutorial.

What is violin rosin made of?

The main ingredient is pine sap. Often beeswax and other ‘secret’ ingredients are added by each different manufacturer. 

Hi! I'm Zlata

Let me help you find a great bow for your violin, so you can improve your bowing technique and sound quality:

Hi! I'm Zlata

Classical violinist helping you overcome technical struggles and play with feeling by improving your bow technique.

How much does violin rosin cost?

Violin rosins are sold between $ 3 and as high as $ 67.

Does more expensive rosin really make a difference?

From my experience the D’Addario rosins of around $ 4 work fine certainly in the early stages of your violin journey.

Personally I use Pirastro Evah PIrazzi Gold violin rosin that costs around $ 25. I find that it’s finer. The bowing feels smooth yet the response of the sound is good. Also you don’t have to rosin that often.

Some violinists use more expensive rosins of $ 50 or more and really believe it’s worth it.

Just as everything it’s personal and a matter of testing which rosin works best for you.