Color your Sound by Bowing on Different Contact Points
Bowing on another place on your string makes your violin sound different
The beautiful thing about violin playing is that you can create variety in your tone
Playing on different contact point enhances your dynamics and expression
On a piano you can only suggest variety in sound. On the violin you’re free to choose a warmer or clearer sound. You want something to sound romantic or even agressive.
How do you make different sound colors on the violin?
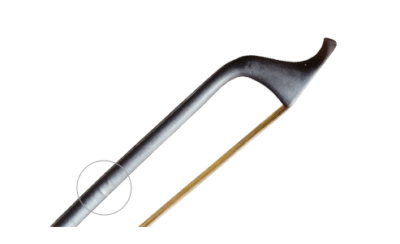
One of the ways is to change the contact point: the place where your bow touches the string.
A prerequisite is that you can bow absolutely straight with a regular tone
When you don’t have control over bowing straight, you don’t have control over your contact point and the sound you create.
Officialy there are five contact points on the violin:
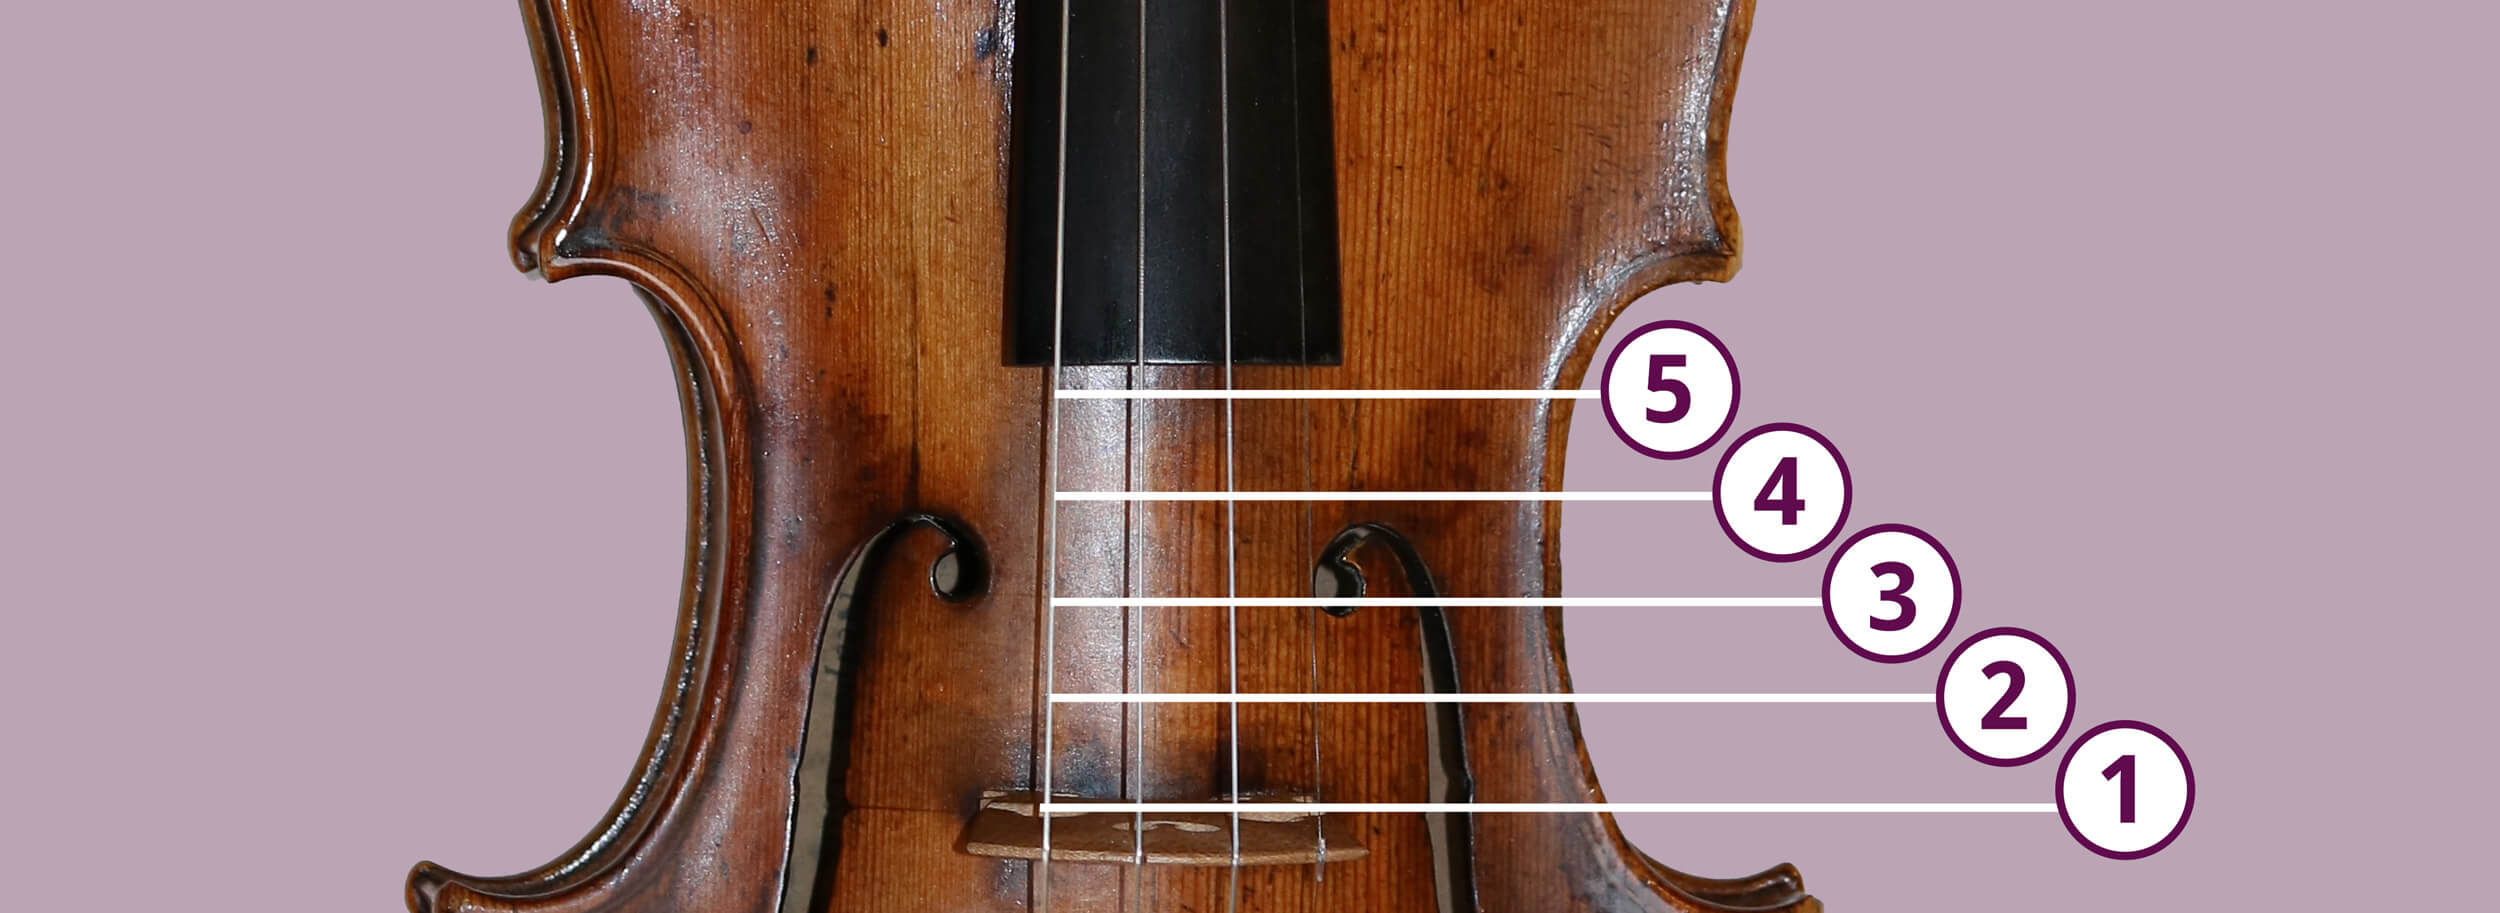
Officialy there are five contact points on the violin
At least take care that you can control all five. However know that coloring your sound and musical expression is an organic thing. It’s not about ‘shifting gear’ between the contact points. You can use an endless variation of contactpoints and vary within one bow stroke.
What place of the string gives the optimal sound?
Your violin sounds best at about 1/9 to 1/10 of the vibrating string length from the bridge. Related to the harmonic series, this is the optimal place to bow.
By bowing on another spot, you can amplify the pure tones or mute them.
Close to the bridge (sul ponticello) there are more harmonic pure tones above the note, so you get a glassy bright sound.
Close to or above the bridge (sul tasto) these harmonics are muted a bit and you get a more mellow vague sound. Some call this flautato, but it’s also possible to play flautato with a high bow speed and little pressure. Click here to read all about different bowing techniques.

Improve your violin bowing technique
Enjoy my FREE mini Masterclass 5 Bowing Secrets to Create a Professional Sound on the Violin
Hi! I'm Zlata
Classical violinist helping you overcome technical struggles and play with feeling by improving your bow technique.
When to use which contact point?
There are three factors to keep in mind: duration, dynamics and position
Long and loud notes are played closer to the bridge. Short tones with a lot of bow are played closer to the fingerboard.
In higher positions the contact point is closer to the bridge, as the optimal 1/9 of the vibrating string lengt is smaller in high position.
At a contact point closer to the bridge, your string will offer more resistance to the violin bow. You have to use more weight at these contact points. On the E string this is most of the times not necessary. To get a clear articulation, use more pressure with your left hand fingers.
How to practice changes in contact points?
When this concept is new to you, you can experiment in front of the mirror. Bow on open strings and discover the different sound colors.
You should know at what contact point you’re bowing without looking. Practice until you’re able to bow on all five contact points with a straight bow and a healthy tone.
Dynamics exercise with contact point changes
Play scales and arpeggio’s crescendo and decrescendo. Get used to changing dynamics only by changing the contact point.
This dynamics exercise is bit more difficult when you play scales and arpeggio’s on one string: you need to adjust your contact point to the position in which you’re playing.
Apply changes in contact points in the music you play. Discover the difference in tone you can make. Combine this with different ways of tone creation, like vibrato, weight, bow division, left hand articulation and bow speed.
Are you interested to learn ALL about tone creation on the violin?
Do you desire to express yourself in music?
As a violin teacher specialized in bowing technique and tone creation I teach violin players world wide how to express themselves in music to touch people’s hearts with their melodic beautiful violin playing. I think the violin is built to be the voice of your Soul.
Bow like a Pro
In my online program ‘Bow like a Pro’ students of all levels learn to master the basics of bowing, create a gorgeous tone and (if they want) learn all bowing techniques. All with the goal of expression and creating beautiful music.
Are you interested? Check it out here!
Sources:
- ‘Art of Violin Playing’ – Carl Flesch
- ‘De kunst van het vioolonderwijs’ (Dutch) – Louis Metz
- ‘Principles of violin playing and teaching’ – Ivan Galamian
- ‘The art of bowing practice’ – Robert Gerle
- Bow like a Pro – research for my online masterclass program
 In one of her videos the Online Piano and Violin Tutor says:

 It is expected that bows of the first violins were equal to the bows of the predecessors of the violin: the rebec, the lira da braccio and the renaissance fiddle. The bows from this period had a characteristic shape. They were curved as a bow and arrow. Though it differed per stick how much the bow was curved, how the hair was secured and how long the bow was. In the period after this, bows became increasingly straight until they finally curved the other way like the modern bow we know today.
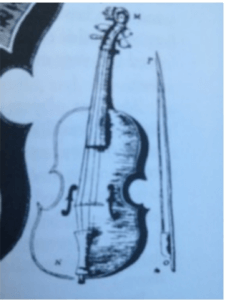 Bows from the early seventeenth century are rarer than violins from this period. The new bows that were made, were better suited to the changed musical and technical requirements. The older bows were unnecessary, so economically worthless. It didn’t seem worth it to store them and keep them in good condition. In addition, it was common to think of a bow as a disposable item and replace it with a new one if there was something wrong with it. It was hardly any more expensive to buy a new one instead of repairing the old one.
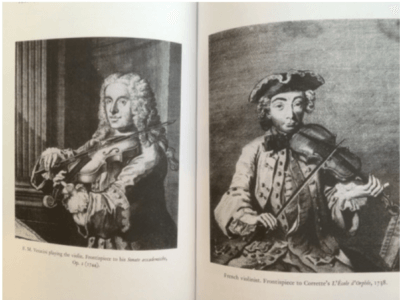 In this period, we see many different types of bows that were used for different purposes. In France, a relatively straight bow was used for dance music and opera. In Italy, a longer, straight or outward curved bow was used for the Sonata players. While in Germany a more curved bow was used and a lot of variation with the length of the bow. Presumably they were experimenting to be able to play strokes “with stops” like portato.
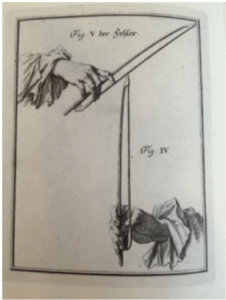 The historians tend to describe all the bows before the Tourte bows as boorish and simple, but we can recollect from the remaining images that the bows were actually very well developed.
 All through the 19th and 20th centuries great efforts were made to develop a stronger bow. Vuillaume developed a metal tube bow of wich his workshop made and sold several thousand pieces and was also the preferred bow of Nicolo Paganini (see picture). This and later metal bows proved to be too fragile because the walls were only paper-thin.
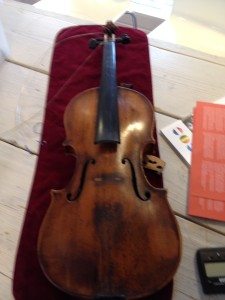 A man came into my violin shop with his granddad’s violin. His granddad played in the Royal Concertgebouw Orchestra his entire life during the first half of the 20th century. It was a German violin from 1840. The instrument had not been played on for almost half a century.
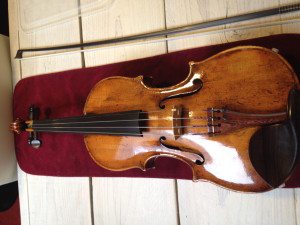 I went to a luthier and had it repaired. In this article you can see the before and after picture.