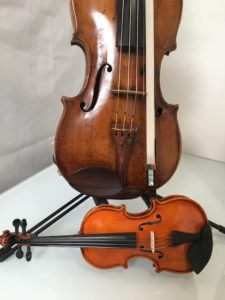
Color your Sound by Bowing on Different Contact Points

Bowing on another place on your string makes your violin sound different

The beautiful thing about violin playing is that you can create variety in your tone

Playing on different contact point enhances your dynamics and expression

On a piano you can only suggest variety in sound. On the violin you’re free to choose a warmer or clearer sound. You want something to sound romantic or even agressive.

How do you make different sound colors on the violin?

One of the ways is to change the contact point: the place where your bow touches the string.

A prerequisite is that you can bow absolutely straight with a regular tone

When you don’t have control over bowing straight, you don’t have control over your contact point and the sound you create.

Officialy there are five contact points on the violin:

Officialy there are five contact points on the violin

At least take care that you can control all five. However know that coloring your sound and musical expression is an organic thing. It’s not about ‘shifting gear’ between the contact points. You can use an endless variation of contactpoints and vary within one bow stroke.

What place of the string gives the optimal sound?

Your violin sounds best at about 1/9 to 1/10 of the vibrating string length from the bridge. Related to the harmonic series, this is the optimal place to bow.

By bowing on another spot, you can amplify the pure tones or mute them.

Close to the bridge (sul ponticello) there are more harmonic pure tones above the note, so you get a glassy bright sound.

Close to or above the bridge (sul tasto) these harmonics are muted a bit and you get a more mellow vague sound. Some call this flautato, but it’s also possible to play flautato with a high bow speed and little pressure. Click here to read all about different bowing techniques.

Hi! I'm Zlata

Classical violinist helping you overcome technical struggles and play with feeling by improving your bow technique.

When to use which contact point?

There are three factors to keep in mind: duration, dynamics and position

Long and loud notes are played closer to the bridge. Short tones with a lot of bow are played closer to the fingerboard.

In higher positions the contact point is closer to the bridge, as the optimal 1/9 of the vibrating string lengt is smaller in high position.

At a contact point closer to the bridge, your string will offer more resistance to the violin bow. You have to use more weight at these contact points. On the E string this is most of the times not necessary. To get a clear articulation, use more pressure with your left hand fingers.

How to practice changes in contact points?

When this concept is new to you, you can experiment in front of the mirror. Bow on open strings and discover the different sound colors.

You should know at what contact point you’re bowing without looking. Practice until you’re able to bow on all five contact points with a straight bow and a healthy tone.

Dynamics exercise with contact point changes

Play scales and arpeggio’s crescendo and decrescendo. Get used to changing dynamics only by changing the contact point.

This dynamics exercise is bit more difficult when you play scales and arpeggio’s on one string: you need to adjust your contact point to the position in which you’re playing.

Apply changes in contact points in the music you play. Discover the difference in tone you can make. Combine this with different ways of tone creation, like vibrato, weight, bow division, left hand articulation and bow speed.

Are you interested to learn ALL about tone creation on the violin?

Do you desire to express yourself in music?

As a violin teacher specialized in bowing technique and tone creation I teach violin players world wide how to express themselves in music to touch people’s hearts with their melodic beautiful violin playing. I think the violin is built to be the voice of your Soul.

Bow like a Probow like a pro

In my online program ‘Bow like a Pro’ students of all levels learn to master the basics of bowing, create a gorgeous tone and (if they want) learn all bowing techniques. All with the goal of expression and creating beautiful music.

Are you interested?  Check it out here!

Sources:

  • ‘Art of Violin Playing’ – Carl Flesch
  • ‘De kunst van het vioolonderwijs’ (Dutch) – Louis Metz
  • ‘Principles of violin playing and teaching’ – Ivan Galamian
  • ‘The art of bowing practice’ – Robert Gerle
  • Bow like a Pro – research for my online masterclass program

You Can NOT Learn to Play the Violin from YouTube

Yes, this is coming from a YouTube violin teacher…

Why I respectfully disagree with the Online Piano and Violin Tutor

If there is ONE thing I have my violin skills to thank for, it’s not talent… it’s not magic… no, it’s great teachers telling me exactly how to do stuff and to spot things I don’t see myself.

The sharpest knife can’t sharpen itself.

online piano and violin tutor thinks private lessons are outmoded and archaicIn one of her videos the Online Piano and Violin Tutor says:

“A teacher is necessary if you want to make a career out of music, however, if you just want to play an instrument, going down this route is an outmoded and archaic concept in todays society.”

Look, I’m all into using the internet to leverage the skills of great teachers out there and making it better accessible for a large audience to learn music. I love all teachers that put out free video lessons, just like I do, on YouTube and help violin players world wide.

In the future we’ll learn in new ways and I love researching the benefits it will bring. However I think we must stay honest and realistic if we don’t want to disappoint people.

With a lot of love I share my weekly free violin lessons and on a daily basis I get wonderful comments how useful they are to people.

HOWEVER… I don’t want to raise expectations I can’t meet and I don’t want you to get disappointed. I want the best results for you as I firmly believe that beautiful violin playing is a set of skills EVERYBODY (yes, including you) can learn.

Teaching is much more than sharing information

Teaching is also inspiring, giving gentle feedback, coaching, keeping your students accountable and guiding your students on their way

Yes, you can learn the violin by yourself with YouTube

You’ll be able to play some tunes. However, let’s not pretend that the results are the same as they are from private lessons.

With private lessons you can learn better, get faster progress and reach a higher level.

Is the level you reach by learning yourself the violin enough for you? Great! Is YouTube the only way for you to learn due to budget or location? Go for it.

But don’t have the audacity to call hard working honest teachers useless.

There are many hard working one on one violin teachers, offline or online, who sacrifice a lot to get their students the best possible results.

The Online Piano and Violin Tutor dismissies the qualities and results of ‘regular’ violin lessons by calling them ‘archaic’ and ‘outmoded’.

Join my FREE beginner violin course

I take you from scratch step by step to your first violin concerto including 40 videos, sheet music and violin tabs.
Hi! I'm Zlata

Classical violinist helping you overcome technical struggles and play with feeling by improving your bow technique.

Every heard of the 10,000 hours it takes to master the violin?

That doesn’t mean just having a fiddle under your chin for 10,000 hours hoping you’ll magically learn it all. No, it means quality practice, correction yourself and… FEEDBACK! You don’t get feedback on YouTube.

You can get feedback in offline lessons, live one on one lessons via Skype or Zoom or online courses with video exchange.

I’m a big fan of online learning and the leverage it offers in lessons. Thanks to the internet I can specialize in bowing technique, tone creation and vibrato instead of doing ‘everything for everyone’.

Luckily we have the internet and you can find a teacher and a course that matches your learning style and personality.

How about you?

Do you think private lessons are outdated? Do you think you can learn yourself to play violin? What type of lessons do you take? Share your thoughts in the comments below!


History of the Violin Bow

The bow to a violin is like the voice to a singer

However, in the past violinists threw away bows as garbage when they were broken or old

Throughout the years the violin bow has changed a lot and was subject to many developments. This eventually led to the bow you’ll likely have in your house right now.

Sit back and let me take along the evolution of the violin bow:

Until 1600

The history of the violin bowIt is expected that bows of the first violins were equal to the bows of the predecessors of the violin: the rebec, the lira da braccio and the renaissance fiddle. The bows from this period had a characteristic shape. They were curved as a bow and arrow. Though it differed per stick how much the bow was curved, how the hair was secured and how long the bow was. In the period after this, bows became increasingly straight until they finally curved the other way like the modern bow we know today.

Unfortunately, little bows from this period were kept. It was much more usual to throw away a worn bow and replace it with a new one

The bows were developing very fast at this time, there was always something new and better. The fact that many bows were discarded in this period, tells us something about the worth the violin bow had in this period. The focus was on the violin, not on the bow. In addition, violinist were not thought of very highly, there were even many jokes about the violinists. They were often seen as useless privateers and not at all like artists.

Some bows of the period were very awkwardly and randomly put together, others were well balanced, relatively efficient and even elegant. Different frogs and tips were made to ensure that the stick was separated from the hair. Some bows, however, had no tip or frog.

Until the end of the seventeenth century it was not possible to tighten or loosen the hair of the bow. After this period the screw was invented and gave a whole new dimension to bows.

1600-1650

The history of the violin BowBows from the early seventeenth century are rarer than violins from this period. The new bows that were made, were better suited to the changed musical and technical requirements. The older bows were unnecessary, so economically worthless. It didn’t seem worth it to store them and keep them in good condition. In addition, it was common to think of a bow as a disposable item and replace it with a new one if there was something wrong with it. It was hardly any more expensive to buy a new one instead of repairing the old one.

As you will read later in this article, the the perfected Tourte bow in 1780, made predecessors redundant

Because almost all bows in this period were thrown away, the information that we have about bows from the early seventeenth century, is based on drawings and paintings. Not so much on ‘real’ bows. As the creators of the drawings and paintings were no musicians, the question is how reliable these depictions are.

The bows in this period, certainly those for playing dance music, were relatively short. They were barely longer than the violin itself and slightly more than half of the length of the modern bow. The hair of these bows was thinner than that of our modern bows. The button at the beginning of the bow at the frog was a trim or a ‘ screw ‘ to tighten the hair. The difference is not noticeable on images, so we don’t really know if it was a trim or a screw. Presumably, the first bow with screw only appeared at the end of 17th century and the problem with tightening the hair was not yet resolved in this period.

Although the bows improved in weight, flexibility and stiffness, there was still little standardized and therefore bows differed very widely by the maker and country. Changes that took place in this time were generally that the bows became longer, the arch was flatter, there were better wood species selected (snakes wood was popular) and the stick was formed to combine strength and elasticity. These changes made sure that the balance was better, it was possible to make more subtle strokes, achieve a greater variation in tone and a larger range of dynamics and expression.

1650-1700

The history of the violin bowIn this period, we see many different types of bows that were used for different purposes. In France, a relatively straight bow was used for dance music and opera. In Italy, a longer, straight or outward curved bow was used for the Sonata players. While in Germany a more curved bow was used and a lot of variation with the length of the bow. Presumably they were experimenting to be able to play strokes “with stops” like portato.

It is often thought that before the invention of the modern bow by Tourte, only boorish and clumsy bows were made. However, that’s very unlikely because builders like Stradivari, Stainer and Amati already paid so much attention to optimizing the sound of the violin.

We cannot longer assume that the bow was seen as irrelevant in this period. Stradivari even probably made a matching bow to one of his instruments from pernambuc wood. This is a type of wood that was previously not very common for making bows. Most bows were made out of ‘snake wood’. This bow is lighter and shorter than the modern Tourte bow, so it has less ‘ momentum ‘, but it has a similar quality of balance and response. The interesting thing is that modern violinists can play certain bowing techniques more easily with a Stradivari-like old bow instead of with a modern Tourte bow. This applies not only to music of that time, but also for example in Viotti, Beethoven or Mendelssohn.

At the end of the seventeenth century a movable frog was developed. An important development in the history of the bow. For example, the Stradivari bow that we mentioned earlier had one of them. This meant that the tension of the hair could be arranged. The bows that were developed at this time were not always shorter than the modern bow. Bow makers experimented a lot with the length of the bow. They even made some bows that were longer than the modern bow.

1700-1797

The history of the violin bowThe historians tend to describe all the bows before the Tourte bows as boorish and simple, but we can recollect from the remaining images that the bows were actually very well developed.

Despite that bows were made with a very good quality, there was no standard for the length and the properties of bows. It’s long been thought that the bows were made randomly, but since the violin making was already very developed, it is unlikely that the bows, which are very important for the sound and playing, weren’t made with knowledge and a certain precision.

In the beginning of the 18th century the bow developed even faster the violin itself

In the beginning of this century there was still a distinction between the previously described Italian bow (long and meant for playing Sonata’s) and the French bow (short and intended for dance music). This changed, however, from 1720, because of the creation of a Sonata school for French composers and players. The bow became straighter and longer and it looked very elegant. Some bows already show a preparation on the bending the other way (inward rather than outward), like the Tourte bow. The point of the bow began showing characteristics of the modern bow compared to the ‘ fluted ‘ Baroque bow in which we see the bow slowly descending. The German bows, however, were still bent outward. These bows were still not suitable for three-or four-tone chords.

Unfortunately, there are no bows preserved by Johann Sebastian Bach, so it’s a mystery what bow he used to carry out his violin Partitas, in which he uses many chords.

All developments that the bow had undergone so far, were already pointing to the development of the modern bow. These developments eventually came into being because of changing musical requirements and therefore the changing needs of violinists.

Eventually it was Francois Tourte, who used the experiments of other bow makers to create one standard bow design

He added all previous experiments together, optimized the design and also optimized the process of manufacturing. This bow became the standard for future bows to this day. This standard was even more of a determining factor than that Bett’s violin form of the Stradivari violin was for the violin building (there are still several violins built to the Guarneri model).

Tourte standardized the length and shape of violin, viola and cello bows and determined the form, the amount of hair, the material (pernambuco wood) and the way the bow was made. Tourte worked together with the violinist Viotti. It is striking that the equilibrium point of the Tourte bow is relatively high compared to its predecessors. Tourte made about 5000 bows in his life that through his great success were soon copied by many other bow makers.

1797 – Now

In 1797 the English engineer Henry Maudslay applied for a patent on the first efficient screw-cutting lathe. Until then screws were difficult to make and really expensive which is why, until about 1800, only rich people could afford a bow with a screw while most musicians were using bows with clip in frogs. The wooden bows that are still widely used today stem from a time when pure gut strings with no windings were played. The first steel strings were made at the end of the 19th Century, when metal windings became available which allowed to play much more powerful. They became necessary because concerts were no longer played in the small halls of the nobility but in the new large public halls that were being built in the western world at the time. Steel strings became possible only with the technological advances at the end of the 19th Century high tensile steel wires became available.

Tourte and his followers designed the standard modern bow to match the strings that were being used during the 19th Century, which were predominantly pure gut strings. Metal windings were too expensive until about 1900. By then electricity became the big thing and copper wire was mass produced for cables. This copper wire was then used for winding the lower strings to give them more punch. At the same time the quality of steel improved to the point where thin wires could be made strong enough to be used as violin E-strings. (It was also the time that the grand piano was developed around the new “piano wire”.)

These new strings were much heavier than gut strings and allowed a much stronger technique. While pure gut violin strings can stand a force of only 2 Newton (200 grams), metal wound strings can take about 3 Newton. But that was not what the Tourte bows were designed for.

Since then players have had to develop a somewhat awkward and difficult technique to work with this uneven match of strong strings and soft bows.

History of the violin bowAll through the 19th and 20th centuries great efforts were made to develop a stronger bow. Vuillaume developed a metal tube bow of wich his workshop made and sold several thousand pieces and was also the preferred bow of Nicolo Paganini (see picture). This and later metal bows proved to be too fragile because the walls were only paper-thin.

When Bernd Müsing began to look into this problem, it was clear that only a tube made from high-density carbon fiber could provide significant improvements over pernambuco. Other simpler carbon bows did not offer the right elasticity and had too much high frequency damping, drawing a dull sound lacking badly in overtones. A violin bow with a clip in frog like those used until the early 19th Century weighs only about 40 grams. Its agility allows Bach and Mozart to be played with the appropriate delicacy. The heavy romantic Tourte bows ended up with a weight of about 60 grams. We found the ideal weight that allows a violinist to play the entire repertoire properly to be half way between the two extremes, at around 50 grams.

Most people think of wood as an especially resonant material ideal for making violin bows – which it isn’t

It was the only light construction material available during the time that stringed instruments were developed.

Carbon fiber components can have much better resonance characteristics than wooden parts – if designed and made properly

The vast majority of wooden bows that were made are long lost through wear and fatigue. Sweat degrades the wood, the screw wears the bore from the inside, metal strings leave dents in the shaft. Worst of all, the continuous vibrations of the stick wear out the material so that sooner or later the stick fails, usually at the thinnest part directly behind the head.

Hi! I'm Zlata

Let me help you find a great bow for your violin, so you can improve your bowing technique and sound quality:

High-density carbon fiber sticks like those made by Arcus in Germany are not only 10 times stronger, but also immune to changes in humidity and its surface is scratch-proof. They will never bend or lose their camber. The metal bearings protect the stick against the screw and ensure its ease of function. For all we know all these bows will still be played hundreds of years from now when all wooden bows will either be broken or safely stored in museums or private collections.

How a good quality bow can cure the fatigue and pain in your shoulder, arm and hand

Within the first year of Arcus bow production several musicians discovered that the Arcus bows apparently solved ergonomic problems including pain and fatigue in the thump, wrist, elbow and shoulder of the bow arm.

They found that the 50 Hz low frequency vibration of traditional bows are the cause of these problems. The reduced weight and increased stiffness of the Arcus sticks shift their fundamental resonance to 100 Hz (one octave higher), which seems to be well outside the dangerous frequency range.

My arm is not even tired after an eight hour orchestra day with my Arcus S9 violin bow


Expand your possibilites in sound, musical expression and interpretation

Most players who own an Arcus bow play it exclusively. The most important reason is probably that no conventional bows offer the same variability in sound and technique.

An Arcus enhances the freedom of interpretation and allows to play with increased precision and clarity. The articulation is crisp and clear. Perfect intonation in the upper registers is also more easy to achieve due to the clear and transparent sound they draw. The sound of the lower strings comes out more melodic.

Arpeggio and fast string crossings are easier to execute because the bows are lighter and perfectly balanced (you’ll feel like your cheating!). Even col-legno doesn’t need to trouble you any further, as the stick’s surface is harder than the metal winding of the strings. Finally you can play at full power without damaging the stick or the bow hair.

Are you interested in experiencing all advantages of Arcus bows for your violin, viola or cello?

11 Winter tips for you and your violin to survive these cold months

Does your violin go out of tune every day?

Winter is coming… well, it’s there already…

Like a living creature, your violin responds to weather changes

Let’s get started where it all starts with: Wood is material in motion… wood shrinks and expands due to changes in temperature and humidity. As your violin is mostly made of wood, this happens to your instrument.

In the winter, some violins go out of tune very often. The temperature difference between inside and outside is higher. The air can be dry because of your heater. Your violin has to adapt to the climate of your home, car and the new location.

Winter tips for your instrument

1. Don’t be scared if your instrument is quickly and often out of tune

This may have to do with the winter weather. Some people think that they have broken something or done something stupid, but that is most often not the case.

Bring your instrument back into tune and tune regularly until your instrument is more stable during a study session or rehearsal.

Hi! I'm Zlata

Classical violinist helping you overcome technical struggles and play with feeling by improving your bow technique.

2. Leave a little earlier to your rehearsal, lesson or performance

In this way you give your violin time to adapt to the temperature and humidity of the new environment. Also you’ll have plenty of time to tune.

3. Avoid changes in temperature and humidity as much as possible

Don’t leave your instrument in a cold room, that you heat up quickly when you have to be there. Don’t put your violin in the trunk (which remains cold), but on the back seat of your car. Make sure that it can’t fall of.

4. Are your strings in good condition?

Strings get weaker because of changes in tension: they snap, waddle in pitch or often go out of tune. Take extra good care that your strings are in good condition in winter season. Are your strings older than 1 year? Then they probably need to be replaced. I recommend that an amateur who plays violin 1 hour a day replaces the strings at least yearly. Do you play more? Then you need to replace them more often. I replace my violin strings every four months… then they are really gone and I’m happy when I am playing on new strings again.

5. Do the pegs of your violin, viola or cello run smoothly?

If your pegs are not doing a good job in the summer, it will only get worse in the winter. Very often it works to treat your pegs with peg soap: remove one string at a time from the peg, remove the peg from the peg box, rub it firmly with peg soap and place the peg and string back. Tune the string and repeat the process for the next string. It is truly a miracle potion!

Didn’t this help? Then it may be that your pegs are not a good fit and  you need to replace them or let a violin builder make them fit.

6. Is the room of your instrument usually too dry?

Drought can cause cracks in your instrument. If the environment is too dry, you might consider purchasing a small humidifier for in your violin case. With stable humidity values ​​between 40% and 70%, you do not have to worry. Many violin cases are equipped with a so-called hygrometer.

Your main musical instrument is of course your own body…

Tips for yourself as a violinist

7. Wear gloves very often!

It is not only annoying if it takes time to warm your hands before you can play optimally. If your hands are very cold (and therefore your muscles and joints), then you can get an injury while playing. In very cold rehearsal rooms you could consider playing with fingerless gloves.

8. Muscles and joints just love heat!

If you are cold and you do all kinds of virtuoso tricks, you’re likely to experience discomfort … make sure to do a warm-up not only in sports, but also in music! I myself find stretching (yoga) in between a rehearsal very pleasant.

9. Rub, rub, rub!

You’ll probably have seen it in ladies magazines: in winter you should keep your skin hydrated. As a musician, this applies especially to your hands … playing with a cut in your fingertip is painful or even impossible. So buy the thickest hand cream out there and rub it! It’ll keep keep your fingers smooth and will not quickly become numb. It’s also important that you choose a cream that quickly withdraws: you merely want to rub your hands and not your instrument.

10. Take care of your violin spot!

Violinists can have more trouble with their violin spot in the winter. A violin spot is a spot / irritation / discoloration in your neck caused by the pressure of the chin rest. Udder ointment works very well to take care for and reduce your violin stain. Conditions for this to work are of course a well-fitting chin rest and shoulder rest with a good violin: then you have no hassle of a violin spot.

11. Take a hair dryer with you!

Yup, here comes Zlata again with a weird tip … Do you always suffer from cold hands and gloves don’t help? Just take a hair dryer with you to your rehearsal and blow your hands warm before you start playing. Just rub with a good hand cream and you’re ready to go! Don’t worry, there are violin soloists who do this.

Do you have more winter tips for string players? Do you have questions regarding this article? Let me know in the comments below!

38 Beautiful and Easy Student Concertos for Violin (free sheet music!)

My top 3 easy violin concertos as a violin teacher

Develop your musicality and technique with the most beautiful violin student concertos or enjoy listening to them

Scroll down to see my full list with 38 easy violin concertos in the first position including free violin sheet music.

After 1 or 2 years of violin lessons, you probably finished your first beginner method book and you can start playing easy concertos.

Student concertos for violin are composed in a way that you can play them in the first position with very basic technique, but they have beautiful melodic lines.

In a beginner method book you play short pieces and often children’s songs and folk tunes. I student concerto is a lot longer and you’ll be practicing it for a while before you can perform it. Practicing them you’ll improve your playing technique on the violin and your musicality and expression in making music.

For adults it’s often a relief when they can finally play a beautiful classical piece instead of the sometimes childish tunes for their beginner books.

Student concertos and concertinos are ideal to play in a violin student’s concert.

My young and adult violin students love performing them.

The student concertos I mention in this article are often played by my students in my violin studio. In a student performance they can make a big impression when accompanied by a pianist. After hard practice it’s great to play them for family and friends.

Student concertos have, just as usual classical violin concertos, three movements: a first movement with a beautiful melody, a more romantic and slow second movement and an impressive third movement.

Are you reading this and are you not up to playing a student concerto? Then just enjoy the recordings and practice hard… who knows how quickly you can play them!

1) Concertino in G major opus 11 by Ferdinand Küchler

I think about everybody who plays the violin, has played this piece in the past. It’s often the first concerto you’ll play. It’s very simple and a good first step in playing longer pieces after your first method book. When played very stalwartly with beautiful phrasing, you can make a big impression on your audience.

When can you start playing this concertino?

When you know the high and low second finger and therefore can play the G major two octave scale on the violin, you can start practicing this concerto. There are some other fingerings, but not many, so you can learn them while studying this piece. Everything is in the first position.

Sheet music

Click here to download the sheet music with the violin part and the piano accompaniment.

Would you like to learn to play this piece?

I’ve made extensive instruction video violin lessons for this concert in my online violin studio, the Violin Lounge Academy. Click here to check it out and enroll!

Join my FREE beginner violin course

I take you from scratch step by step to your first violin concerto including 40 videos, sheet music and violin tabs.

2) Concerto in b minor opus 35 by Oscar Rieding

Beautiful melodic lines and a flashing third movement characterize this concerto. The third movement makes me think about a gypsy party. My students tend to start playing this concerto after Küchler opus 11. It’s all in first position, but it’s a bit harder. The minor key might be something you have to get used to and there are a bit more alterations (changes in finger positions between high and low).

When can you start playing this concerto?

This concerto is a bit more difficult than Küchler opus 11 or the Indian Concerto by Perlman (also nice!), so I would advice to study this concerto when you’ve already played a student concerto before. It’s all first position, but the intonation (hitting the right notes and playing in tune) is a bit more difficult and there are some more alterations.

When you are learning from a part two or three from a violin method book like Sassmanshaus, you can start playing this concerto.

With this concerto you can improve fluency in your bowing technique, phrasing (making musical sentences) and musicality in general.

Sheet music

Click here to download the sheet music with the violin part and the piano accompaniment.

Would you like to learn to play this piece?

I’ve made extensive instruction video violin lessons for this concert in my online violin studio, the Violin Lounge Academy. Click here to check it out and enroll!

Hi! I'm Zlata

Classical violinist helping you overcome technical struggles and play with feeling by improving your bow technique.

3) Concertino in the style of Mozart by Hans Millies

Are you learning to play the violin for about two years and do you love Mozart? You’ll definitely enjoy practicing and playing this concertino by Millies. It has the sparkly and transparent character of Mozart’s music. This concertino is a great preparation to playing Mozart’s violin sonata’s and violin concerto’s later on.

When can you start playing this concerto?

This concerto is a bit more difficult than Küchler opus 11 or the Indian Concerto by Perlman (also nice!), so I would advice to study this concerto when you’ve already played a student concerto before. It’s all first position, but the intonation (hitting the right notes and playing in tune) is a bit more difficult. Also the intonation is very ‘open’ just like the real Mozart (open means that people can hear it right away when you’re just a little off… this is because of the way it’s composed). Also there are some more difficulties in terms of rhythm and bowing technique.

With this concertino you can develop clarity in your bowing technique (and learn spiccato), trills and playing in tune. It’ll prepare you to play real works of Mozart like his violin sonata’s and violin concerto’s. You can already learn the playing technique necessary to playing works from the classical era.

Just like the ‘real’ Mozart it’s not very hard to play this concertino for 80%, but if you really want to play it cleanly and musically, it’ll cost you some effort.

Fun detail: this concertino has a real cadenza! You’ll feel like a real concert violinist.

Sheet music

Click here to download the sheet music.

Complete 38 easy 1st position student concertos

You’ll never be bored with this complete list of violin concertinos that are also in the first position and easy to play for beginner violinists.

Click here to download the FREE sheet music for ALL of these student violin concertos.

  • Beer, Op.47
  • Beer, Op.81
  • Brown, Op.10
  • Brown, Op.11
  • Brown, Op.13
  • Essek, Op.4
  • Huber, Op.7
  • Huber, Op.8
  • Huber, Op.11
  • Huber, Op.30 (2 vln)
  • Huber, Op.36
  • Járdányi
  • Jockisch, Op.6
  • Küchler, Op.11
  • Küchler, Op.14
  • Mendelssohn, L., Op.213
  • Millies, Style of Mozart
  • Mokrý, in G major
  • Portnoff, Op.9
  • Portnoff, Op.13
  • Portnoff, Op.18
  • Rago
  • Rieding, Op.34
  • Rieding, Op.35
  • Rieding, Op.36
  • Röntgen, Op.85
  • Röntgen, Op.88
  • Sartorio, in C major
  • Sartorio, in F major
  • Schmidt, Op.54
  • Seitz, Op.13
  • Seitz, Op.22
  • Sitt, Op.93
  • Söchting, Op.95 (2 vln)
  • Söchting, Op.138 No.1
  • Szerémi, Op.63
  • Veit, Op.25 (open strings)
  • Yanshinov, Op.35

Ready for the next level?

If you’re already introduced to position play, check out these intermediate concertos.

What’s your favorite easy violin student concerto?

Did this article fill you with nostalgia thinking back to the early years of your violin playing? Or has this article inspired you to start playing your first student concerto? Or did you just sit back and enjoy listening to the recordings? Do you have another easy violin student concerto you can recommend to others? Share it in the comments below. I’m looking forward reading your response to this article.