How great it is to be an amateur musician
In the violin world it’s often only about child prodigies and becoming a pro. Sometimes we tend to forget that music is a fun social activity that is open for all levels and ages. When I got this wonderful e-mail from Charles, I immediately wanted to share it with you, so I’m doing so with his permission:
Written by: Charles Gagnebin, retired attorney
I have been nothing more than an amateur musician since childhood and have loved what it means to me to stay an amateur and not worry about the inability to be professional.
There is so much you read online which takes a negative view towards being an amateur musician.
I find that frustrating since to me being an amateur, mainly on piano and violin, is a gem of my life at age 80.
I was never allowed to take music lessons in my youth because of a fear of my parents that I might spend too much time in music which was a problem of a nephew at the time. My father had been in the Harvard Banjo Club in the 1920s so I played with and taught myself how to play his old tenor banjo still residing in our house. I remember a high school teacher condemning that instrument.
After I graduated from Harvard and started a job at MIT on a track towards my career as a patent lawyer I warmed up musically by buying a used piano from a technician there to help me try to learn to sing so that I could pass the audition to sing in the MIT Choral Society. The singing turned out to be a total failure but playing the piano became an early amateur music gem in my life. I taught myself the basics of playing and early on discovered the beauty of playing fakebook style in which the left hand music was essentially chords matching the melody of the right hand music. Many books were and are available with fakebook music of all styles presented in a relatively easy to play form. Many people still look on that form of playing as bad but if you focus your music life at the amateur level those comments are meaningless and it makes you play easily, comfortably and joyfully. I only started taking piano lessons over 30 years later when my wife and I stopped on the way home from work at a music store for her to take guitar lessons that left me sitting for half an hour with nothing to do. That encouraged me to start taking piano lessons from the nice teachers there. She gave me no serious pressure to abandon fakebook but encouraged me to learn both hand playing in the normal style to develop my hand skills on the piano. We became such good friends that several years later she and her spouse to be asked me to become ordained and perform their wedding in New Hampshire which of course I did gleefully.
About the time I started a brief period of piano lessons my wife and I started contradancing and I was so impressed to see live fiddle playing at contradances that I convince myself to take up playing a bowed instrument, starting of course with a viola tuned the same as my father‘s tenor banjo. A few months later I got a real Violin and three months after that went to Mark O’Connors fiddle camp outside of Nashville Tennessee in June 2000. I remember with total comfort taking a lesson from Martin Hayes who’s one comment stuck with me endlessly and that was “keep it fun”. That establishes the value of being an amateur, playing as well as you can at an amateur level and loving the results of what you do as an amateur. I continue to play both piano and fiddle with endless comfort. I play classical, folk and bluegrass mainly. I have even made a few short recordings for professional level use by friends after a period of working on the tune.
This all comes down to being an amateur musician needs to be seen at a level of fun and simplicity that makes you enjoy your playing to the maximum possible. Continuing to learn is of course important but without the pressure to aim toward a professional level.
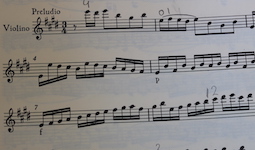 This would be default bowing: one bow stroke per note. The transitions between the notes aren’t particularly fluent, but also not accented. There is no variation in pressure. Examples are in Bach’s partita in E major, Paganini’s 16th caprice and the 1st movement of the Viotti concerto no 22 (16th notes).
 Examples:
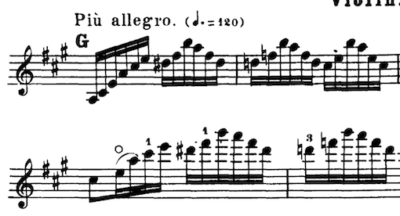 The name is a bit misleading as this technique is produced with the fingers and a relaxed and flexible wrist. The arm is as still as possible. This gets you a very efficient, small détaché for extremely fast and light passages. The last page of Saint-Saëns’ Introduction and Rondo Capriccioso (the Allegro) would be an example.
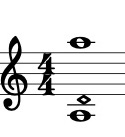
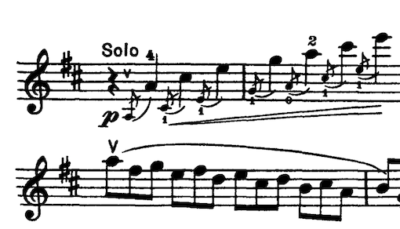
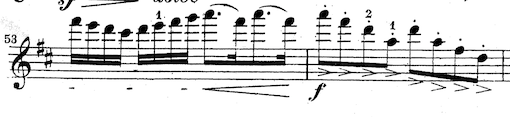 The notes are clearly separated and start with an accent, like in the shown fragment of the Mozart violin concerto in D Major and in Praeludium and Allegro by Kreisler.
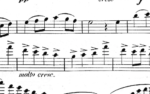 The note starts with an accent that has the bite from a martelé.
 Lots of sources call this martelé lancé as the high speed and accent is more martelé. An example would be the opening of the Beethoven violin concerto. There’s no special notation of this in the sheet music.
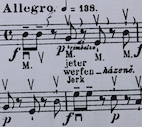 This is a quick vertical slap creating a firm accent. This is usually done at the frog or the tip, as in the middle of the bow it would get you a ricochet, uncontrolled bouncing or at least not a marked sound. It can be done up bow or down bow.
 Examples:
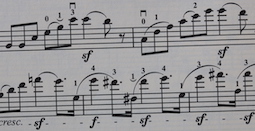 Just as the previous bow stroke, some would definitely categorize this one as a type of martelé, but again: books, teachers and performers differ.
 This is bowing with a deep and full tone like in the beginning of the Bruch violin concerto. Again, no special marking in the sheet music except that you know these are long bow strokes and the dynamics would be forte.
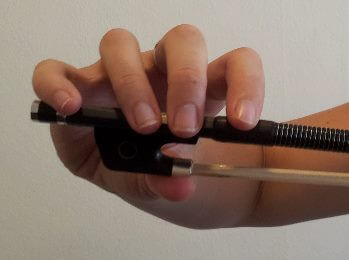 The violin bow hold was dependent on the musical purpose and the type of bow. Throughout the centuries we can distinguish two schools of bowing: French and Italian. They both had their own development until they merged in the 18th century.
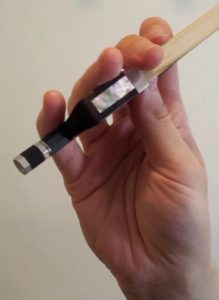 Italian violin bow hold until 1600
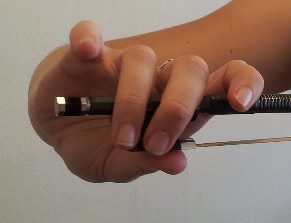 Bow holds weren’t standardized at all: it wasn’t even unusual to bow with the left hand.
 Italian violin bow hold 1600-1650
 Bow holds didn’t change much. The French hold with the thumb below the hair lost it’s popularity and the Italian hold with the thumb between the stick and the hair became more and more standard.
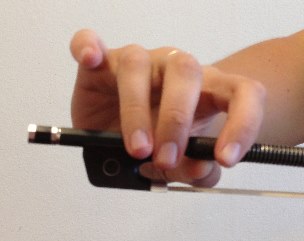
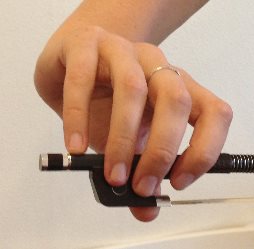 The violinist Flack promoted the French hold, firmly gripping the hair with the thumb creating a deep bowing and tone. He taught that the index finger should touch the stick around the top joint (see picture) and one shouldn’t bow too much near the bridge. In his time the bow was mostly held higher up the bow and he taught to hold the bow at the frog as we do now.
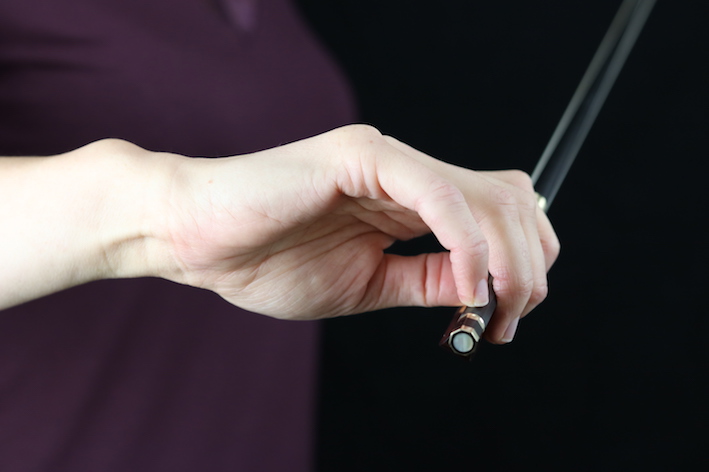
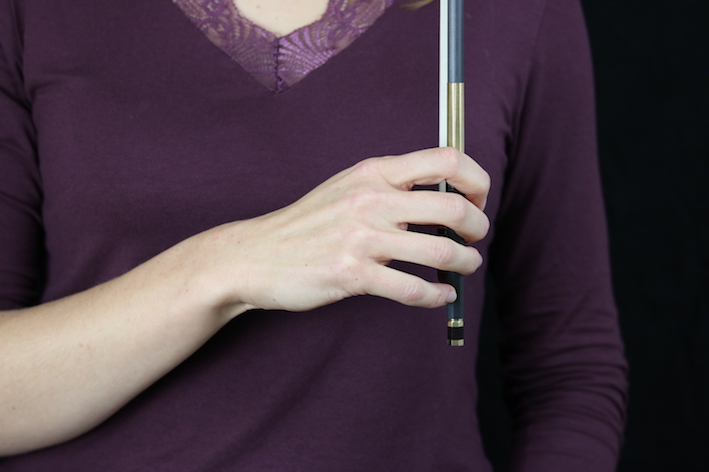
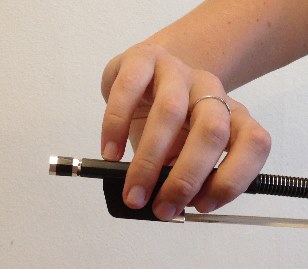 In his book from 1756 Leopold Mozart (yup, the father of…) describes that the bow should be held at the frog between the middle phalanx of the index finger and the thumb. The fingers should be held relatively close together. The pinky shouldn’t leave the bow in any circumstance, as it contributes to bow control and determines the weight in the bow stroke. The index finger shouldn’t be placed too much over the bow and shouldn’t be too far removed from the other fingers. Stretching the index finger over the bow is a grave error and stiffens the hand. The hand should do most of the work when creating a soft sound. The bow should be pivoted slightly in the direction of the scroll.
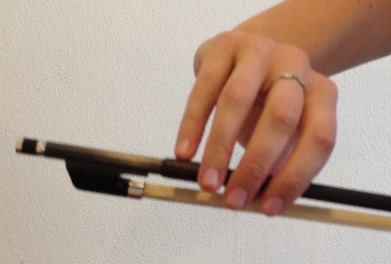 Campagnoli
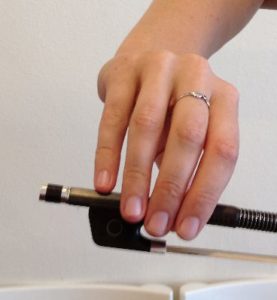 In
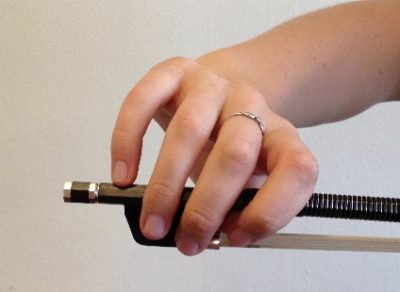
In 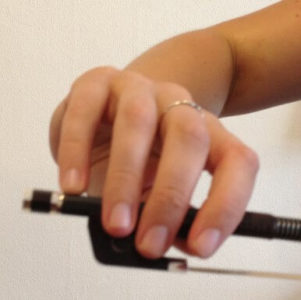 In this bow hold the index finger is placed sideways on the stick right before the first joint. The hand is placed a bit more in the direction of the tip. When you do this, you’ll feel more control over the bow. Also you’ll be better able to transfer weight into the bow. By spreading the fingers a bit more you can transfer even more weight. The fingers are placed more over the bow, as the position of the index finger allows this. This hold looks rounder and gives you more ‘grip’ in general.
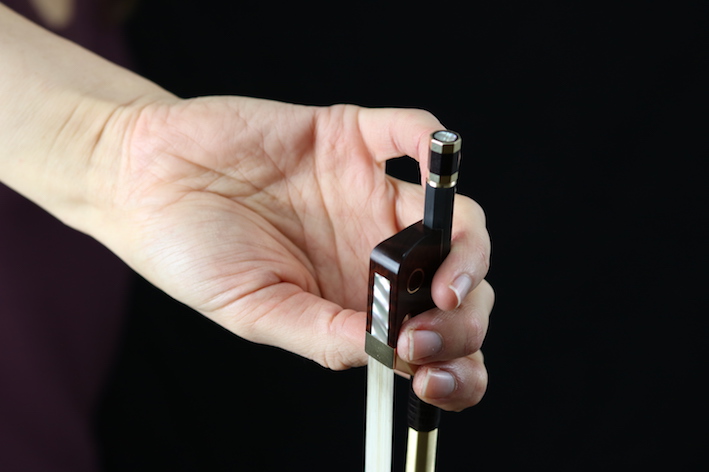
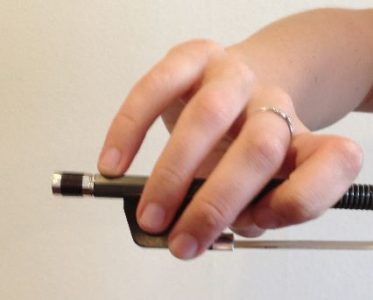 At first Flesch preferred this hold (before the modern hold developed). The index finger is even further over the bow compared to the old German and Franco Belgian bow holds. The stick touches the third phalanx of the index finger. The index finger embraces the bow with the second and third phalanx. The index finger and middle finger are close together.
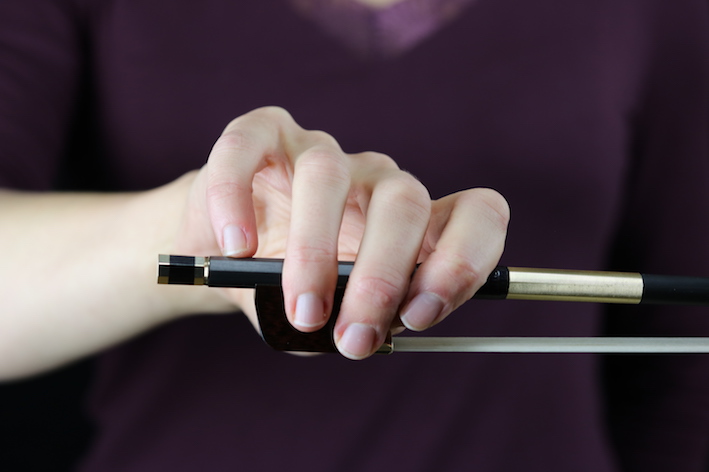
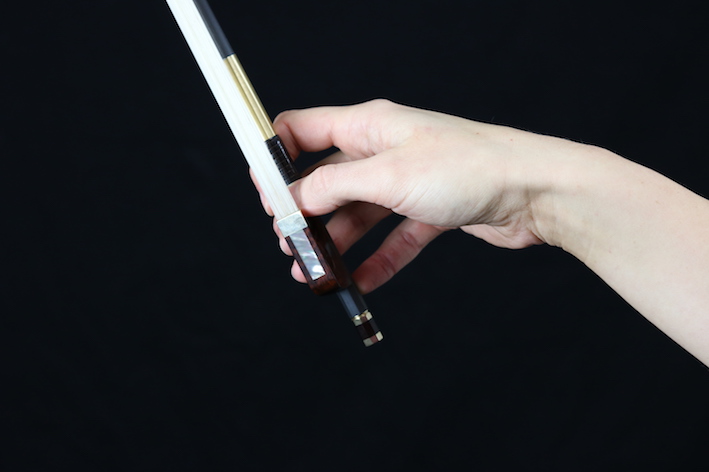
 As you take a look at the three last bow holds described above, you might notice that the index finger is placed more and more over the bow and the hand is tilted more and more in the direction of the tip (pronation).