How to read rhythms and note values in sheet music

Learn all about note values, time signatures, measures, what 4/4 means, what tempo or BPM to use and much more!

Even if you’ve always find reading rhythms in sheet music very confusing, I bet that after reading this article it will be clear for you.

How long should a quarter note be?

How to know at what BPM to play a piece?

What do terms like allegro, vivace and largo mean and how fast are those tempi exactly?

We’ll get to all of that, but first things first…

Let’s start with the time signature you see at the beginning of a piece of sheet music

Time signatures are made up of two numbers. The top number indicates how many beats are in each measure and the bottom number indicates which note is equivalent to a beat. For example, in the time signature ¾, the top number 3 tells us there are 3 beats in the measure, and the bottom number 4 tells us the quarter note gets the beat. If you were to see a 2 on the bottom, that indicates the half note gets the beat, an 8 indicates that the eighth note gets the beat, and a 16 indicates that the sixteenth note gets the beat. You can think of the beat as one metronome click.

The standard rhythm is 4/4. If you see a big e in front of the music where the measure usually is, the measure is 4/4. A waltz is usually a 3/4 measure. A tango is often a 2/4 measure.

Learning point: the time signature tells us what the beat is and how many notes of that beats are in a measure. This does not say much about the speed or the tempo yet.

How does the time signature relate to the metronome?

Practicing with a metronome like my free online metronome right here is very effective to learn the rhythm of the piece of music you are practicing.

Metronomes emit a higher-pitched click on the first beat of each measure, which is why it is important to set them to the time signature of the piece you’re practicing. Accenting the first beat of each measure is helpful because it makes it very easy to tell if you are with the metronome or not. Say you were in the middle of a measure and hear the higher-pitched click indicating beat one; you will immediately know that your tempo is off. It is up to you to determine if you were playing too fast or too slow, and adjust your tempo accordingly.

Note Values

In a piece of music you play notes of different lengths

We know the beat from the time signature, but in music there will be longer and shorter notes than the beat. This is related to the note value.

The shape of the note tells us the note value

Learning point: Note values let us know when a note should be played and how long a note should be held for.

Here are some of the most common rhythms and how many beats they get in a 4/4 measure.

A whole note gets four beats.
A half note gets two beats.
A quarter note gets one beat.
An eighth note gets half a beat. (Two eighth notes equal one beat).
A sixteenth note gets one-quarter of a beat. (Four sixteenth notes equal one beat).

Dotted Rhythms

Whenever you see a dot next to a note (directly next to it, not under or over it as that means something else entirely), it tells us to add half of that note’s value to that note. Let’s use a dotted half note as an example. A half note gets two beats- half of two is one, so I add one beat to the note getting a total duration of three beats.

rhythm notation music chart
dotted rhythm chart
note value chart

Easy way to learn note values for children

I teach note values to my young students with the rhythm pies. In Dutch (I live in Holland), the word for music note (noot) is the same as nut, so I ‘bake’ my young students ‘nut cakes’. Mind that for adult beginners these nut cakes can also be very handy to make things easy to digest (pun intended).

You can see the cake as a measure (this is indicated by the time signature in sheet music) and you fill the cake with ‘nuts’ (notes) of different note values.

Whole note

(semibreve)

Half note

(minim)

Quarter note

(crotchet)

Eighth note

(quaver)

Sixteenth note

(semiquaver)

Learn rhythms in sheet music

You can bake your own rhythm cake as well. Below are some examples of rhythm cakes with various note values. You can create one for each piece you play to know how the note values you see in that piece fit in the time signature. I’ve added two blank rhythm cakes for 3/4 and 4/4 in a higher resolution. Just right click, save the cake to your computer and print it in whatever size you want.

4/4 Measure printable

Right click to save on your computer and print at the desired size.

3/4 Measure printable

Right click to save on your computer and print at the desired size.

How fast (what tempo) should I play a piece of sheet music

Now you’ve learned all about the note values and time signatures, but they don’t tell you yet at what speed to play. You can see it as an elastic band with lines written on it. When you stretch the band you play the same notes in a lower tempo. When you don’t stretch, you play exactly the same music at a higher tempo.

What BPM should I use?

BPM stands for ‘beats per minute’, which tells you the tempo.

This totally depends on the piece! Also different performers might choose to play the same piece at a different speed. It’s not carved in stone. For example look up different videos of the Mendelssohn concerto and note that not all videos are of the same length.

Learning point: The BPM is not defined by the time signature, but instead by the tempo marking.

The tempo marking is most often an Italian term notated at the beginning of the piece. In longer pieces, you may also find that the tempo changes and new tempo markings are given at the beginning of certain sections. Additionally, some pieces may indicate the BPM at the beginning of the piece in which case, you can easily see exactly what speed to use!

If there is no speed or tempo marking indicated, listen to recordings to get a general feel for the tempo. You can use your metronome to click along to the recording and adjust until you find a BPM that is relatively close to what you hear.

Below we’ll go a bit deeper into common tempo markings you find in violin sheet music.

Common Tempo Markings in Music

When you embarked on your violin journey, did you know you’d have to learn a bit of Italian too?! Tempo markings are generally (but not always) in Italian, simply because the majority of the 17th-century composers were Italian, which was the time when tempo markings were first extensively used and codified.

Here is a comprehensive list of Italian tempo markings and their corresponding BPMs:

Slow Tempo Markings

Tempo Marking

Larghissimo
Grave
Lento
Lentissimo
Largo
Larghetto/Adagissimo
Adagio
Adagietto
Tranquillo
Andante moderato

Translation

Very, very slow
Slow and solemn
Slowly
At a very slow tempo
Broadly
Rather broadly
At ease, slow and stately
Rather slow
Tranquil, calmly, or peaceful
A bit slower than Andante

Beats per Minute (BPM)

20 bpm or slower
20 - 40 bpm
40 - 60 bpm
48 bpm or slower
40 - 60 bpm
60 - 66 bpm
66 - 76 bpm
70 - 80 bpm
80 bpm
69 - 84 bpm

Moderate Tempo Markings

Tempo Marking

Andante
Andantino
Allegretto
Moderato
Allegro moderato

Translation

At a walking pace, moderately slow
Slighlty faster and more light-hearted than Andante
Moderately fast, but less than allegro
Moderately
Moderately quick, almost Allegro

Beats per Minute (BPM)

77 - 108 bpm
90 - 112 bpm
98 - 115 bpm
108 - 120 bpm
116 - 120 bpm

Fast Tempo Markings

Tempo Marking

Allegro
Vivace
Vivacissimo
Allegrissimo or Allegro vivace
Allegro assai
Presto
Prestissimo
Veloce

Translation

Fast, quickly and bright
Briskly, Lively and fast
Very fast and lively, faster than Vivace
Very Fast
Very, very fast
Very fast, hastily
Faster than Presto
Lightning Ling Ling fast

Beats per Minute (BPM)

120 - 138 bpm
144 - 160 bpm
160 - 172 bpm
172 - 180 bpm
178 - 190 bpm
185 - 200 bpm
200 - 208 bpm
210+ bpm

How to practice your rhythm skills

A great tool to practice your rhythm skills is to use a metronome like my free online metronome right here.

  1. Set your metronome at 60 BPM.
  2. Practice clapping with the metronome on various simple rhythms. Start with quarter notes (one clap per click), then half notes (one clap per two clicks), and then eighth notes (two claps per click).
  3. Practice playing these simple rhythms on your instrument on one note (on the violin for example open strings)
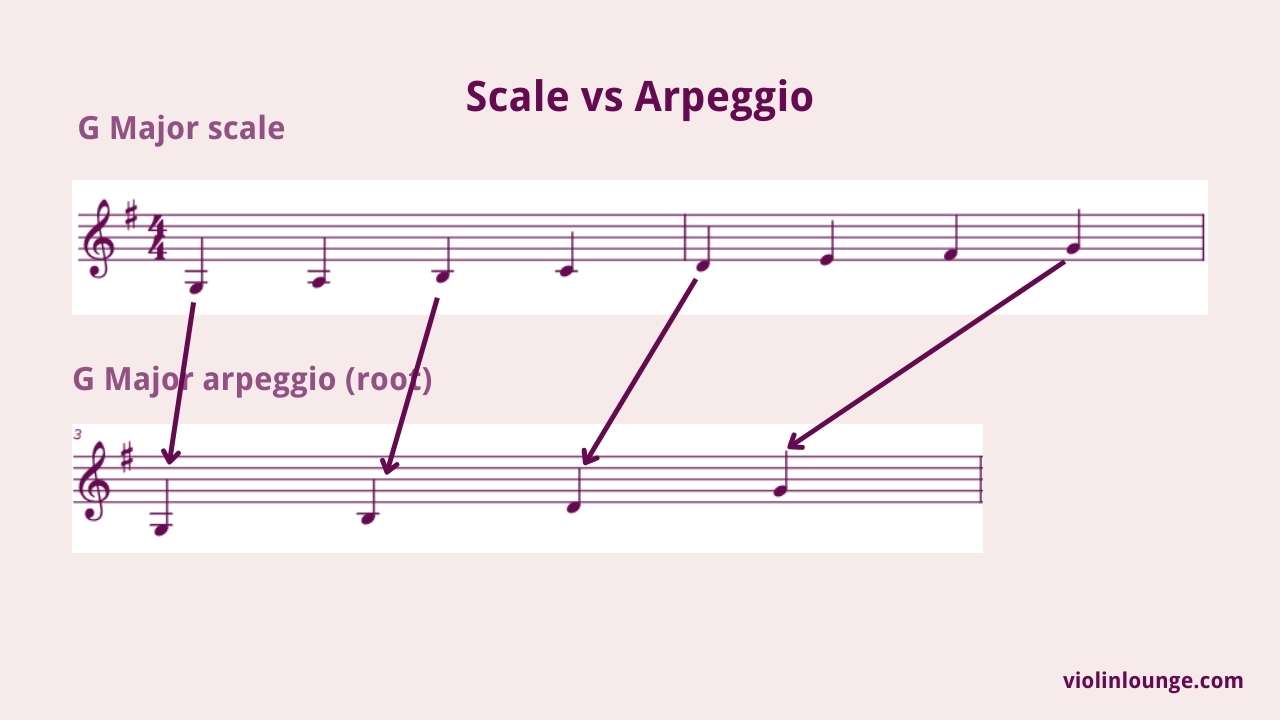
  4. Practice scales in these simple rhythms.

As you’re getting used to playing your instrument at a steady beat, explore some more complex rhythms. See if you can play the dotted rhythms on this page for example. This is why I’ve added subdivisions to my free online metronome, so you can check yourself playing various rhythmic patterns.

How to practice the rhythm of pieces you play

After the exercises above you are more familiar playing different tempi and rhythmic patterns along with the metronome. Don’t worry if it confuses you at first. It takes some time to get used to practicing with a metronome before you really start benefitting from it.

First play some pieces you already know along with the metronome, just to see if you can stay in sync. After that practice some pieces you are still learning with the metronome.

Happy practicing!

Be sure to share this article with your music friends.

What are violin bows made of? These are the best materials:

Why is horse hair the best for violin bow hair? What’s the difference between a pernambuco stick or a carbon fiber one?

In this article I will go into all regular materials violin bows are made of, which include horse hair, synthetic materials, types of wood, pearl and even turtle shell.

You’ll learn why certain materials are used and what difference they make.

Let’s take a look at the violin bow parts, which are made of different materials:

violin bow parts

Read more details in this full article on violin bow parts.

The violin bow hair that touches the strings of the violin while playing is usually horse hair, but we’ll discuss alternatives below. The stick is made out of wood or carbon in a variety of quality levels. At the tip, you’ll find the tip plate and at the frog where you hold the violin bow we have a beautiful pearl inlay on the bottom (slide) and the side (Paris eye).

What are the best materials for a violin bow and why? Let’s go in depth…

Violin bow hair

Bow hair is the part of the bow that prompts the most questions. Is it actually made from horses, or can it be just any hair? How does the bow grab the strings? The vast majority of violin bows do indeed use horsehair, and have from the beginning.

Best horse hair for violin bows

Luthiers prefer to use hair from horses who live in very cold climates because they produce thicker hair to keep warm. The best choices are Siberian, Mongolian, Manchurian, Polish, and Argentinian. Stallion hair is best because it is cleaner than hair from mares. The hairs might be varying lengths and thicknesses, so they are sorted several times to find the ideal ones for bowmaking. Luthiers are very mindful of the quality of hairs in their bows, so many will sort the hairs yet again on their own. Violin bow hair can also be different colors: you probably have only seen white-haired bows, but cellists and bassists sometimes use black because they say it is coarser.

Horse hair alternatives

Horsehair is the most traditional and effective material, but we now have the technology to make bow hair out of other things. A company called Coruss has created synthetic bows that do not use any animal products (the vegan violin bow). According to their website, they noticed a decline in horsehair quality, which the Mongolian horse breeders said was due to hotter summers and more snowfall in winter. These changes affected the horses’ natural food supply, and thus affected the strength and quality of their hair. Coruss developed synthetic hair made from fibers that would be more durable than regular horsehair. As it is not affected by humidity and temperature, it can be played for several years without needing a rehair.
For the stick, Coruss uses either carbon fiber or a carbon fiber/pernambuco blend. Coruss also offers a special rosin meant for synthetic hair. The rosin is made from organic materials with eco-friendly techniques. Aside from its sustainability and longevity, Coruss hair also has visual appeal: you can choose from eight different colors for the hair! Synthetic hair is an intriguing option if you are open to trying new things.

Rehairing your violin bow

We briefly mentioned bow rehairs. Why is that necessary and how often should it be done? You may have occasionally had bow hairs break off while you were playing. If this happens too much, you will need to get a rehair to replace the ones you have lost. The hair is also affected by changes in humidity and temperature that stretch it out over time, and it is dirtied by dust and oils. The question of how often to rehair is rather personal. It depends on how much you play and how well you clean your bow. It never occurs to many people that simply cleaning the hairs thoroughly refreshes your sound and postpones the need for a rehair.

Watch a video of a violin bow maker doing a rehair right here.

How to clean your violin bow hair

To clean your bow hair, unscrew the screw from the frog so that the frog and hair separate from the stick. Dip a toothbrush into a small amount of rubbing alcohol and gently brush it through the bow hairs. Just be sure that the alcohol does not touch the wood of the bow and that you let the hairs dry completely before screwing the bow back together. You can also occasionally clean the wood of the bow with violin polish if there’s rosin build-up. If you are taking proper care of your bow, then you may only need a rehair once a year.

Watch this video to learn how to clean your violin bow hair and stick yourself.

Myth about violin bow hair hooks

The other myth about rehairs is that horsehair gets worn out when the little “hooks” on it start to get dull. However, horsehair analyzed under a microscope is completely smooth. There are no hooks, it is the friction created by the rosin that makes the sound. To prove this, try playing on a new bow that has no rosin and see if you can make a sound!

Violin bow stick

If the bow hair can be either natural or synthetic, what can the stick be made out of? Bowmakers use different materials depending on the desired quality and flexibility.

Terms you may have heard include brazilwood, sandalwood, and pernambuco. How are these three things different, and which is the best?

Pernambuco violin bows

We’ll start with pernambuco. François Xavier Tourte, the famous French bowmaker, introduced pernambuco in the 19th century. Ever since, it has been the preferred wood for bow-making due to its ideal density, strength, and flexibility. Pernambuco is the heartwood (innermost ring) of the paubrasilia echinata tree, the national tree of Brazil. Unfortunately for violinists, this tree is now listed as an Appendix II endangered species. This means that while the use of pernambuco is not banned, it is more strictly regulated. If pernambuco is ever moved into Appendix I, that would mean a near total ban on use, and you would need special permission to even travel with a pernambuco bow. While conservation efforts are being made, it is a slow process as paubrasilia echinata trees require very specific growing conditions.

Sandalwood or Brazil wood violin bows

If you’ve just gotten into violin playing, then your bow is most likely brazilwood or sandalwood.

Sandalwood is a yellow, fine-grained wood that is often used for student bows. Strictly speaking, brazilwood is the outer ring of the paubrasilia echinata tree. Pernambuco comes from the denser heartwood, brazilwood from the less finely grained outer layers. However, in reality other types of wood are sometimes used for bows and labeled as brazilwood, so it can be difficult to know the origin of the wood for sure. (It is also worth noting that only bowmakers distinguish between the inner and outer layers of paubrasilia echinata—in the lumber yard it is all considered brazilwood!) Brazilwood is considered less valuable than pernambuco because its density is not as ideal and because it loses its springiness much more quickly. However, depending on how well it has been cared for, not every pernambuco bow is in better shape than every brazilwood bow, so it is best to get the opinion of a professional.

Sandalwood violin bow

Sandalwood can be a great alternative to pernambuco if you’re tight in your budget. However it lacks the density and is more sensitive to changes in temperature and humidity, which can make it warp.

Brazilwood violin bow

The term brazilwood doesn’t say that much. You can get a decent affordable brazilwood violin bow as a beginner, but be aware that the quality levels of brazilwood bows vary a lot.

Carbon fiber violin bow

The uncertainty of pernambuco’s future availability has fueled the synthetic bow industry. There are three basic categories of synthetic bows: carbon composite (of various types), carbon fiber, and straight fiber.

Carbon composite violin bows

Carbon composite or fiberglass are often used for beginning student bows. They are durable and cheap to produce, but not very complex. Being offered for as cheap as $ 30 and still being usable, they are great for a tight budget. Usually for a wooden bow you’d have to spend more for a similar quality level. Carbon composite bows usually have a low percentage of carbon and a high percentage of epoxy, which affects the playing characteristics and sound.

Carbon fiber violin bows

Carbon fiber bows like CodaBow, JonPaul and Müsing are of a higher quality. Most of the time they have weaved look. The price and quality levels vary a lot from cheap bows around $ 100 to professional level carbon fiber bows of over $ 1,000. In my buying guide to carbon fiber bows you can see all the major brands including video demonstrations and reviews. 

High tech straight fiber carbon fiber violin bows

Another fascinating synthetic option is Arcus. Arcus bows are based on the principle that wooden bows were created to go with gut strings, so we need a stronger bow for today’s metal strings and higher tension on our instruments. Just like violins, Arcus bows are hollow on the inside, giving them special resonance and flexibility. They are also lighter than standard wood bows. In my buying guide to carbon fiber bows right here I’ve tested and reviewed all classes and types of Arcus bows.

Many players still prefer traditional pernambuco bows, and if that is your preference that is fine! Every bow is unique however, so it is important to keep an open mind. High quality carbon bows are a good option if you are worried about damaging your bow through wear or humidity. Also they have no travel restrictions like antique wooden bows and maybe in the future pernambuco bows in general.

The violin bow that fits you is very personal, so it’s important that you try out different violins bows within your budget.

Materials of the Frog

Aside from the bow and the stick, bows incorporate other materials as well. The frog is not part of the stick, and is usually made from ebony. The “eye” in the center of the frog is for visual effect and typically made from mother-of-pearl.

Bows are mounted with nickel, silver, or gold. The type of metal used does not affect the sound quality of the bow, so why does this matter? Traditionally, bow makers used more expensive metals for higher quality wood. Now due to rising gold prices, using silver for very high quality bows is more common. Not only that, but some excellent makers use nickel out of modesty and a few less scrupulous ones will use a more expensive metal to make a bow more appealing. Although gold does add lovely aesthetics, remember the sound is always what matters when choosing a bow.

violin bow frog parts

The Violin Bow Tip

The material used for the tip of the bow is a complicated topic. The tip-plate is very important because it protects the wood of the tip from damage, so the material used must be strong. Historically, bowmakers used ivory. However, in 2016 the United States enacted a near-total ban on commercial trade of African elephant ivory. Other countries have similar laws. Bow tips fall under the very few exceptions, but only if the ivory was removed from the wild prior to 1976. Even so, traveling with such a bow requires a Musical Instrument Certificate from the U.S. Fish and Wildlife Service, which must be paid for and is only valid for three years. Many musicians choose to avoid the hassle altogether and travel with different bows. Since new bows can no longer be made with ivory, bowmakers have turned to other materials. Mammoth ivory is a popular choice. (Note that it is illegal to use materials from an endangered species, but not illegal if the species is already extinct.) Other options include bone, faux ivory (a polymer), silver, or ebony. Some student bows may simply use plastic.

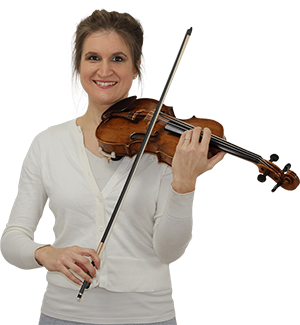
Hi! I'm Zlata

Let me help you find a great bow for your violin, so you can improve your bowing technique and sound quality:

Hi! I'm Zlata

Classical violinist helping you overcome technical struggles and play with feeling by improving your bow technique.

In Summary

One more word on distinguishing between bows: these days it is super easy to go online and find all sorts of cheap bows blatantly advertised as “professional quality”. Sadly, the majority of such bows are not even suitable for beginners! When selecting a bow it is SO important to go directly to a real luthier or respected instrument website that will help you find legitimate products in your price range. Your bow is your sound, so make sure you find what you are really looking for.

What type of violin bow do you have? Share it with us in the comments!

Spiccato Bowing on the Violin

What is spiccato on the violin?

Spiccato strokes are short and fast, and the bow leaves the string after each stroke, creating a “bouncy” sound. In Italian spiccato literally means “to separate”. Spiccato usually works best about one centimeter above the balance point of your bow (which is below the middle) but this depends on the speed of the spiccato. Generally speaking, faster spiccato is done a little higher in the bow.

Spiccato bow stroke in sheet music

In sheet music, spiccato is notated by little dots over or under the notes. How do you know if this is spiccato or staccato, since it is the same marking? It depends on the speed of the piece and the length of the notes. Spiccato is a faster technique than spiccato because the bow bounces best when it is moving quickly. Some composers will also use words to clarify that a passage is to be played off the string.

How to play spiccato on the violin?

When playing spiccato, always start the first note from on the string. Do not drop the bow onto the string for the first note, especially when playing in orchestra because all the violinists dropping their bows will not sound together! Pressing the bow lightly into the string first and using the string’s resistance creates the friction necessary to propel the bounces. As mentioned above spiccato is done at or near the balance point of the bow.

Types of spiccato bowing

There are two main types: brush spiccato and bounce spiccato. Brush spiccato is a broad spiccato in the lower half, and is slightly slower than other types of spiccato. Brush spiccato is an active bow stroke (meaning the right hand/arm actively controls the bounce).

Bounced spiccato strokes are less broad than brushed ones, and the bounce in this case is partly or entirely passive. Bounce spiccato works at a variety of tempos, so just keep in mind that the faster you go, the more the bounce of the bow takes care of itself. You will reach a point at which the right hand stays completely relaxed while the bow rebounds on its own. This comes from the right combination of bow placement, speed, angle, and height of the bounce.

How to practice spiccato?

It is helpful to do simple exercises that break down the spiccato motions before trying spiccato passages in pieces. This begins with developing flexibility in the right hand fingers and wrist. One excellent preparation for spiccato is practicing collé on open strings. To briefly explain, collé is a very unique stroke because it begins on and ends off the string. It is also a wonderful exercise to improve finger flexibility. The bow is placed at the frog, and through the action of the fingers scrubs the string and lifts off. Collé can be done in other parts of the bow, but it is most common and easiest at the frog. The right hand fingers are rounded when initiating a downbow stroke and straight when initiating an upbow. Another way to think of collé is “pizzicato with the bow.” After you have done collé on open strings, try going through a whole scale.

The super-precise collé motion makes the hand more flexible and improves spiccato. To make a good sound, think about whether your spiccato bounces are making the shape of a “V’ or a “U”. V spiccato bounces are very short, and U-shaped bounces have a richer sound, staying a little closer to the string.

There are also several etudes for practicing spiccato. Many of the etudes from Rodolphe Kreutzer’s very famous 42 Studies for Violin can be adapted to this purpose. Let’s use Kreutzer’s Etude No. 5 as an example:

kreutzer etude no 5 sample

Start by playing each note four times (four G’s, four B♭’s, etc.). Do it at a comfortable speed where the bow will bounce naturally. When you can do this evenly with a straight bow, repeat the etude playing each note three times, then two times, and finally as written in spiccato. Do not worry about increasing the tempo right now, just notice how relaxed you are and how consistent your bowing is.

Learning this technique is very important because it appears everywhere in famous violin repertoire. There is this famous spot from Tchaikovsky’s violin concerto, in the beginning of the third movement:

Perhaps you’re thinking “There’s no way I could play that right now!” Not to worry, if you’re looking for more intermediate spiccato example there are several. Accolay’s Violin Concerto in A Minor, a popular piece for advancing students, has a wonderful brush spiccato section:

Another famous spiccato place is in the first movement of Beethoven’s Violin Sonata No. 5:

Finally, it is important to clearly understand the differences between spiccato and some very similar violin bowing techniques. Sautillé is very similar to spiccato, as both are bouncing techniques. However, in spiccato the bow actually leaves the string, whereas in sautillé the stick bounces but the bow hair itself remains on the string. Sautillé therefore works for much faster passages where the bow does not have time to leave the string.

Compare this excerpt from Paganini’s Caprice No. 5 with the videos above to see if you can hear and see the difference:

Flying spiccato is the other very similar technique. It is several spiccato notes played on the same bow stroke (usually upbow) and staying in the same spot on the bow. This happens in the third movement of the Mendelssohn concerto:

In summary, spiccato is definitely one of the more challenging violin bowing techniques, and requires patience and perseverance. However, learning it opens the doors to some of the best violin repertoire in existence.

Hi! I'm Zlata

Classical violinist helping you overcome technical struggles and play with feeling by improving your bow technique.

Improve your violin bowing technique with these lessons and articles:

Do you want to know every possible bowing technique on the violin? Watch this video with 102 violin bowing techniques.

The basis for all bowing techniques is to bow smoothly. This video lesson will help you with that.

A proper and relaxed violin bow hold will help a lot improving your bowing technique and sound. Read this article.

Take bowing technique lessons with Zlata

Join my Violin Bowing Bootcamp to build a great basic technique, make a beautiful sound and learn the most common bow strokes.

Join Bow like a Pro for personal guidance by Zlata and her teacher team combined with an extensive curriculum all things bowing.

Staccato Bowing on the Violin

Staccato, or “detached” in Italian, is a bowing technique where you stop the bow at each bow change to create separation

More generally, it is also a musical term that indicates short, separated notes. Basically any instrument can play staccato, but here we are concerned with what it means as a bowing technique.

How do you know where the staccato is in your sheet music?

The notes will have little dots above or below them. If you see staccato dots only at the beginning of a passage but then the word simile, it means the entire passage is staccato.

Regular staccato is done on separate bows. However, there is also such a thing as upbow staccato.

This is multiple staccato notes on one upbow, but the bow does not leave the string as it travels. Here is an example from Saint-Saëns’ Introduction and Rondo Capriccioso.

Staccato is much easier to play than most people think.

Common errors include trying to make an accent at the beginning of the note, really crunching the bow into the string, or changing the amount of pressure. Here’s the secret: the amount of pressure throughout the stroke remains the same. It is the same concept as detaché, but you stop the bow at the end of each stroke just before changing directions. It is not necessary to change anything else about the stroke.

Like all bowing techniques, staccato is best learned on open strings first, doing the technique described above. Once you can play one staccato note on each bow stroke, try doing to per bow, then three, etc. This will help you develop control and understanding of how much bow you should use per note.

Early Suzuki pieces are designed with staccato in mind, because learning staccato comes before learning beautiful smooth legato bowing. The Twinkle Variations, Lightly Row, and Song of the Wind all incorporate staccato. If you have never played staccato before I suggest starting with simple tunes like these.

Another very fun and easy staccato piece La Cumparsita Tango. It is full of repeated staccato passages in an engaging tango dance rhythm.

If you already know staccato but would like to refine it, or are just curious about how to identify it in pieces, here are some famous examples.

The Kabalevsky concerto is an energetic piece popular among advanced students. The frequent upbow staccatos add vitality to the melody.

Violin Concerto No. 3 in B Minor by Saint-Saëns is a major concerto and frequently performed. In the main theme of the third movement, there are sequential staccato triplets. They are very rapid so it is difficult to tell they are staccato by ear, but Saint-Saëns notated them that way to imply a little extra bite.

Samuel Barber’s violin concerto alternates between flowing legato melodies and dramatic staccato/spiccato passages. Notice the upbow staccato (four notes together) in the passage marked below. Some violinists choose to play this completely on the string (upbow staccato) while others do it slightly off the string (upbow spiccato). Either is fine so long as you have a clear concept of what effect you want.

Lastly, we have our “ultimate staccato challenge”: Hora Staccato by Grigoraş Dinicu. This was one of Jascha Heiftez’s famous encore pieces. It incorporates BOTH upbow and downbow staccato, which is even more challenging! If you are interested in learning this charming piece, now is the time to be dedicated about your staccato practice!

Hi! I'm Zlata

Classical violinist helping you overcome technical struggles and play with feeling by improving your bow technique.

Improve your violin bowing technique with these lessons and articles:

Do you want to know every possible bowing technique on the violin? Watch this video with 102 violin bowing techniques.

The basis for all bowing techniques is to bow smoothly. This video lesson will help you with that.

A proper and relaxed violin bow hold will help a lot improving your bowing technique and sound. Read this article.

Take bowing technique lessons with Zlata

Join my Violin Bowing Bootcamp to build a great basic technique, make a beautiful sound and learn the most common bow strokes.

Join Bow like a Pro for personal guidance by Zlata and her teacher team combined with an extensive curriculum all things bowing.

Detaché Bowing: Default Violin Bow Stroke

Even if you’ve just started playing violin, you’ve probably realized that every single technique has some fancy French or Italian name! Did you know this is even true for the most basic bowing technique? Detaché (which is literally just “detached” in French) is probably the first stroke you learned on violin, along with simple staccato. It sets the stage for future advanced techniques by developing control and smooth bow changes. It may have a complicated French name, but it is not that difficult to understand.

Detaché bow stroke in sheet music

Other bowing techniques have special notation in sheet music, but detaché does not. This makes things simple: if there are no slurs, no dots, no accents or dashes—it’s detaché!

Simple detaché is when there are no special markings in the sheet music, the notes are played to their full value, you make seamless bow changes, and you play one bow stroke per note.

How to practice detaché bowing on the violin

To practice detaché, place your bow at the middle on the D string. The point of contact (where your bow touches the string) your wrist, elbow, and shoulder should form a square that rests all in the same plane. Place your bow on other strings, and adjust your arm to maintain that square shape. Keeping everything in one plane is very important for minimizing tension. Once everything is aligned, being making very small up and down strokes, only a few inches. The most important thing is to keep the bow parallel to the bridge and the tilt of the bow hair even.

Types of detaché bowing

Besides the simple detaché there are other types of detaché as well, including accented detaché with or without bite, grand detaché, and finger detaché.

Accented detaché has accent marks over the notes. The accent is created by adding a little index finger pressure and bow speed at the beginning of the note. Accented detaché with a bite is a slightly stronger version of this and is very similar to martelé.

Grand detaché is also very similar. The bow strokes are very long (almost the entire bow) with a full-bodied solistic sound.

Finger detaché is ideal for very fast passages, and utilizes the fingers and wrist. These should be very flexible. A good way to practice finger detaché is to put your right elbow against a wall so that your arm cannot move. In this way you can only move the bow with your wrist and fingers. At first this will be easiest in the middle, but eventually you can do the same thing at the frog and at the tip.

There are even more types of detaché than these, but these are the most important ones to know in the beginning. If these five definitions are too overwhelming, then just focusing on the first one will get you very far. To help clarify how these are all different, below are examples of every detaché variation we just discussed.

#1 Simple Detaché: Paganini’s Caprice No. 16

#2 Accented Detaché: Saint-Saëns’ Violin Concerto No. 3 in B Minor

#3 Grand Detaché: Kreisler’s Praeludium and Allegro

#4 Finger Detaché: Saint-Saëns’ Introduction and Rondo Capriccioso

After watching these examples you probably notice that some techniques overlap. For example, fast simple detaché will require a lot of finger/wrist motion. Many detaché passages in violin music are much simpler than any of the above examples. It is the first bowing technique you will learn and the basis for all the others, so take your time and practice with confidence!

Hi! I'm Zlata

Classical violinist helping you overcome technical struggles and play with feeling by improving your bow technique.

Improve your violin bowing technique with these lessons and articles:

Do you want to know every possible bowing technique on the violin? Watch this video with 102 violin bowing techniques.

The basis for all bowing techniques is to bow smoothly. This video lesson will help you with that.

A proper and relaxed violin bow hold will help a lot improving your bowing technique and sound. Read this article.

Take bowing technique lessons with Zlata

Join my Violin Bowing Bootcamp to build a great basic technique, make a beautiful sound and learn the most common bow strokes.

Join Bow like a Pro for personal guidance by Zlata and her teacher team combined with an extensive curriculum all things bowing.